Using approximations it took 1 year and 3 months for the savings of the Ecobee 3 to pay for itself in our test environment. Purchase price was $300 because of additional sensor (3 total). Our test environment is a detached one story house with building size of 2501-3000 sq. ft.. 3 bedrooms and age between 16-20 years. Depending on your structure and heating and cooling specs expect anywhere between 1-3 years for the device to pay for itself, not including rebates and other perks from energy and insurance companies. Seriously if you are still using that old stuff upgrade now to save yourself some moolah!
Ecobee Update (Break Even!)


Corrugated Metal
Here in NWFL and much of the south humidity can take its toll on materials. Take this drywall for example. This is roughly 30 years of patch work and leaving a garage door open when it should be closed over night. Eventually the drywall will sag and mud will chip away due to moisture and temperature changes of the days and seasons. You can patch, then re patch again, but eventually it starts looking really bad. The reason for the drywall is for firewall and prevention of fire spread should something happen in the garage. I'd say double up your drywall for the wall between the garage and main house or use fire rated drywall for that and use what you want for the garage ceiling and walls. Here's an alternative for your garage ceiling. We used Corrugated metal. The cost was cheaper, the install went quicker and I think it looks better. For trim we used a roof eave trim. Personally I think this does the same job if not better for fire prevention, but there is always some inspector out there that thinks otherwise for EVERYTHING. When you buy or build your home on your property, it's yours and that's where that whole 2nd Amendment / Hell off my property Mr. Inspector or anyone that disagrees comes into play. Have Fun! :)


Water Heater Replacement
So these things breakdown anywhere between 3 and 30 years. Faulty engineering, bad materials, take your pick are the causes. This one which we forgot to take a pic of broke down after only 10 years. So we replaced with our favorite brand - Bradford White. Here's how you do it. First, you cut the breaker to make sure power is turned off. Second, cut the water off to the house or the line going into the water heater if there is a shutoff valve. Drain the tank by connecting a water hose to the bottom valve. Once water is drained cut the pipe with a pipe cutter, in this case copper. Here comes the easy part, go to the big orange store and get yourself some Shark-bite brand water heater lines. "Back-in-the-day" you would have to sweat pipe which include getting sand paper, flux, torch and solder. With these Shark-bite parts you literally push them on and that is it. Once piping is complete hook up power making sure it is off. Once connected turn the water back on and let the water heater fill up, then turn the power on. If you can move and lift a water heater you can replace them! We used 2 Shark-bite water lines and sweat the overflow valve only because we had spare parts laying around. Enjoy!


H&C Colortop
So this concrete stain is a first use for us. Used this product for trim on concrete edge. Suprisingly good finish and you can tell it will last longer than any standard concrete paint. There is a solvent based and water based version of the same product. The solvent will last longer but you can only get certain colors. If you want any color like this here mocha you'll have to go with the water based solution. Looks like it will last 5 years. Tried scrathing into it and it didn't budge. Overall great product, zero complaints!


Painting with Portland
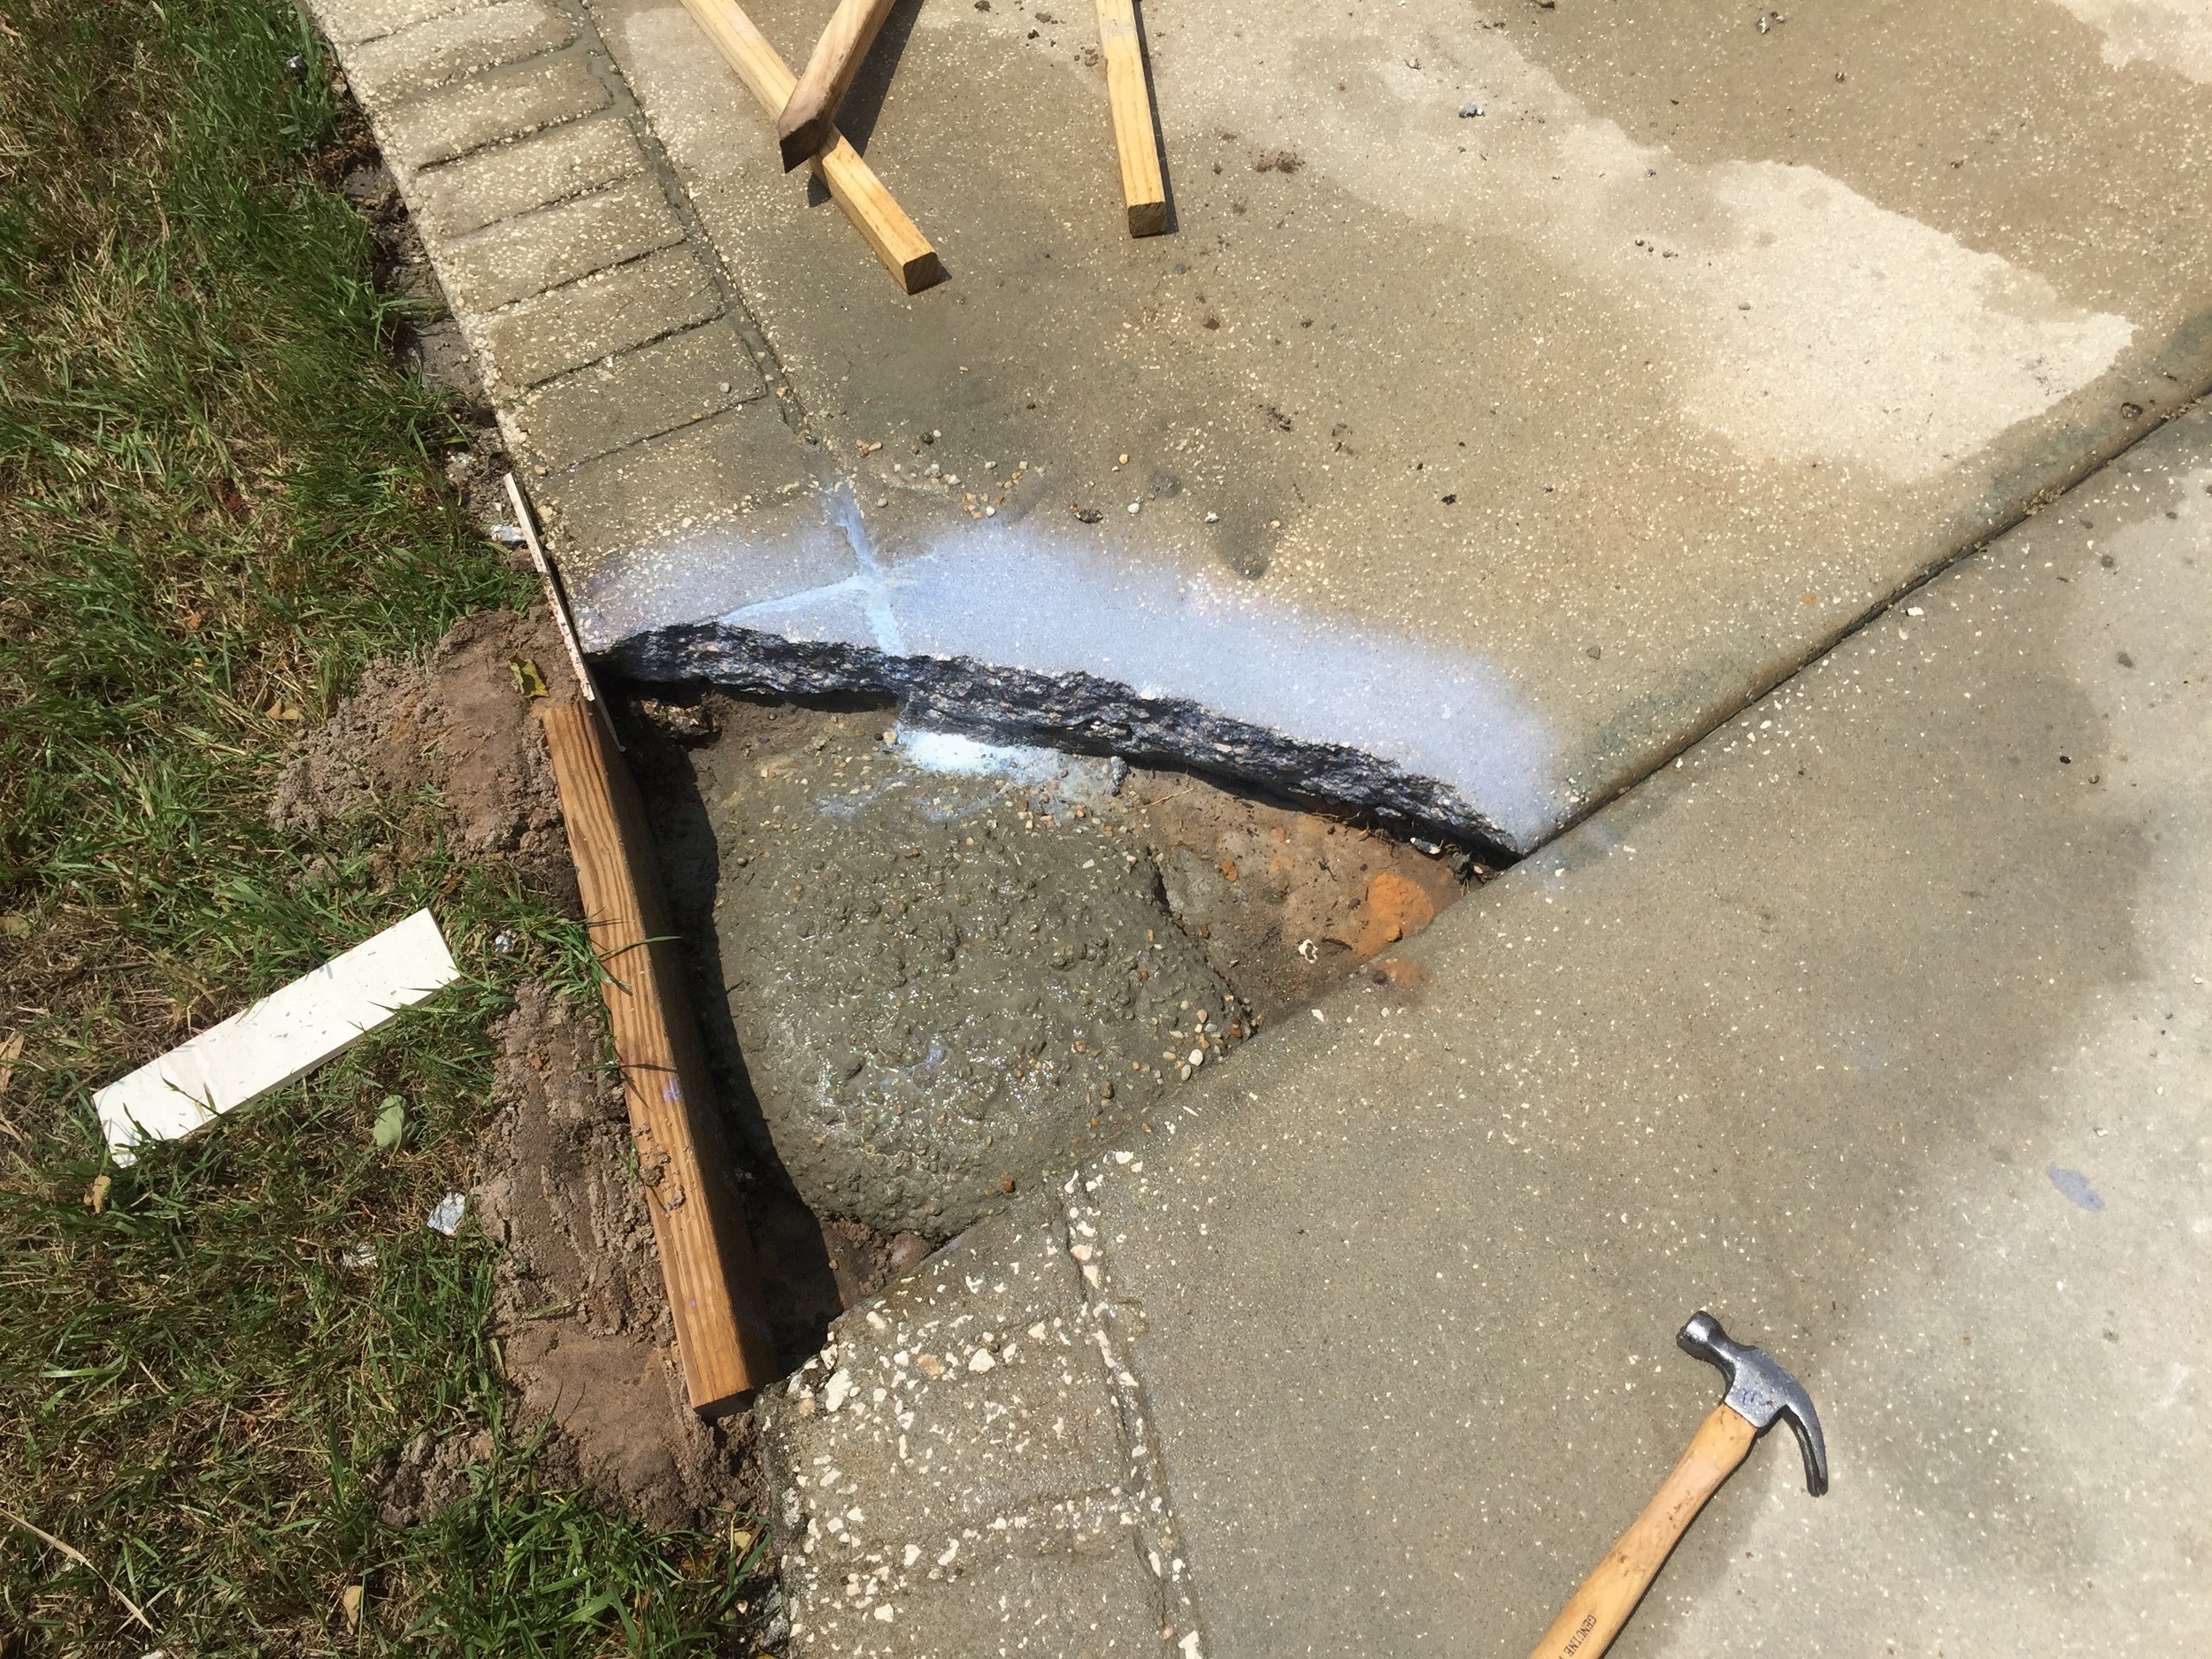
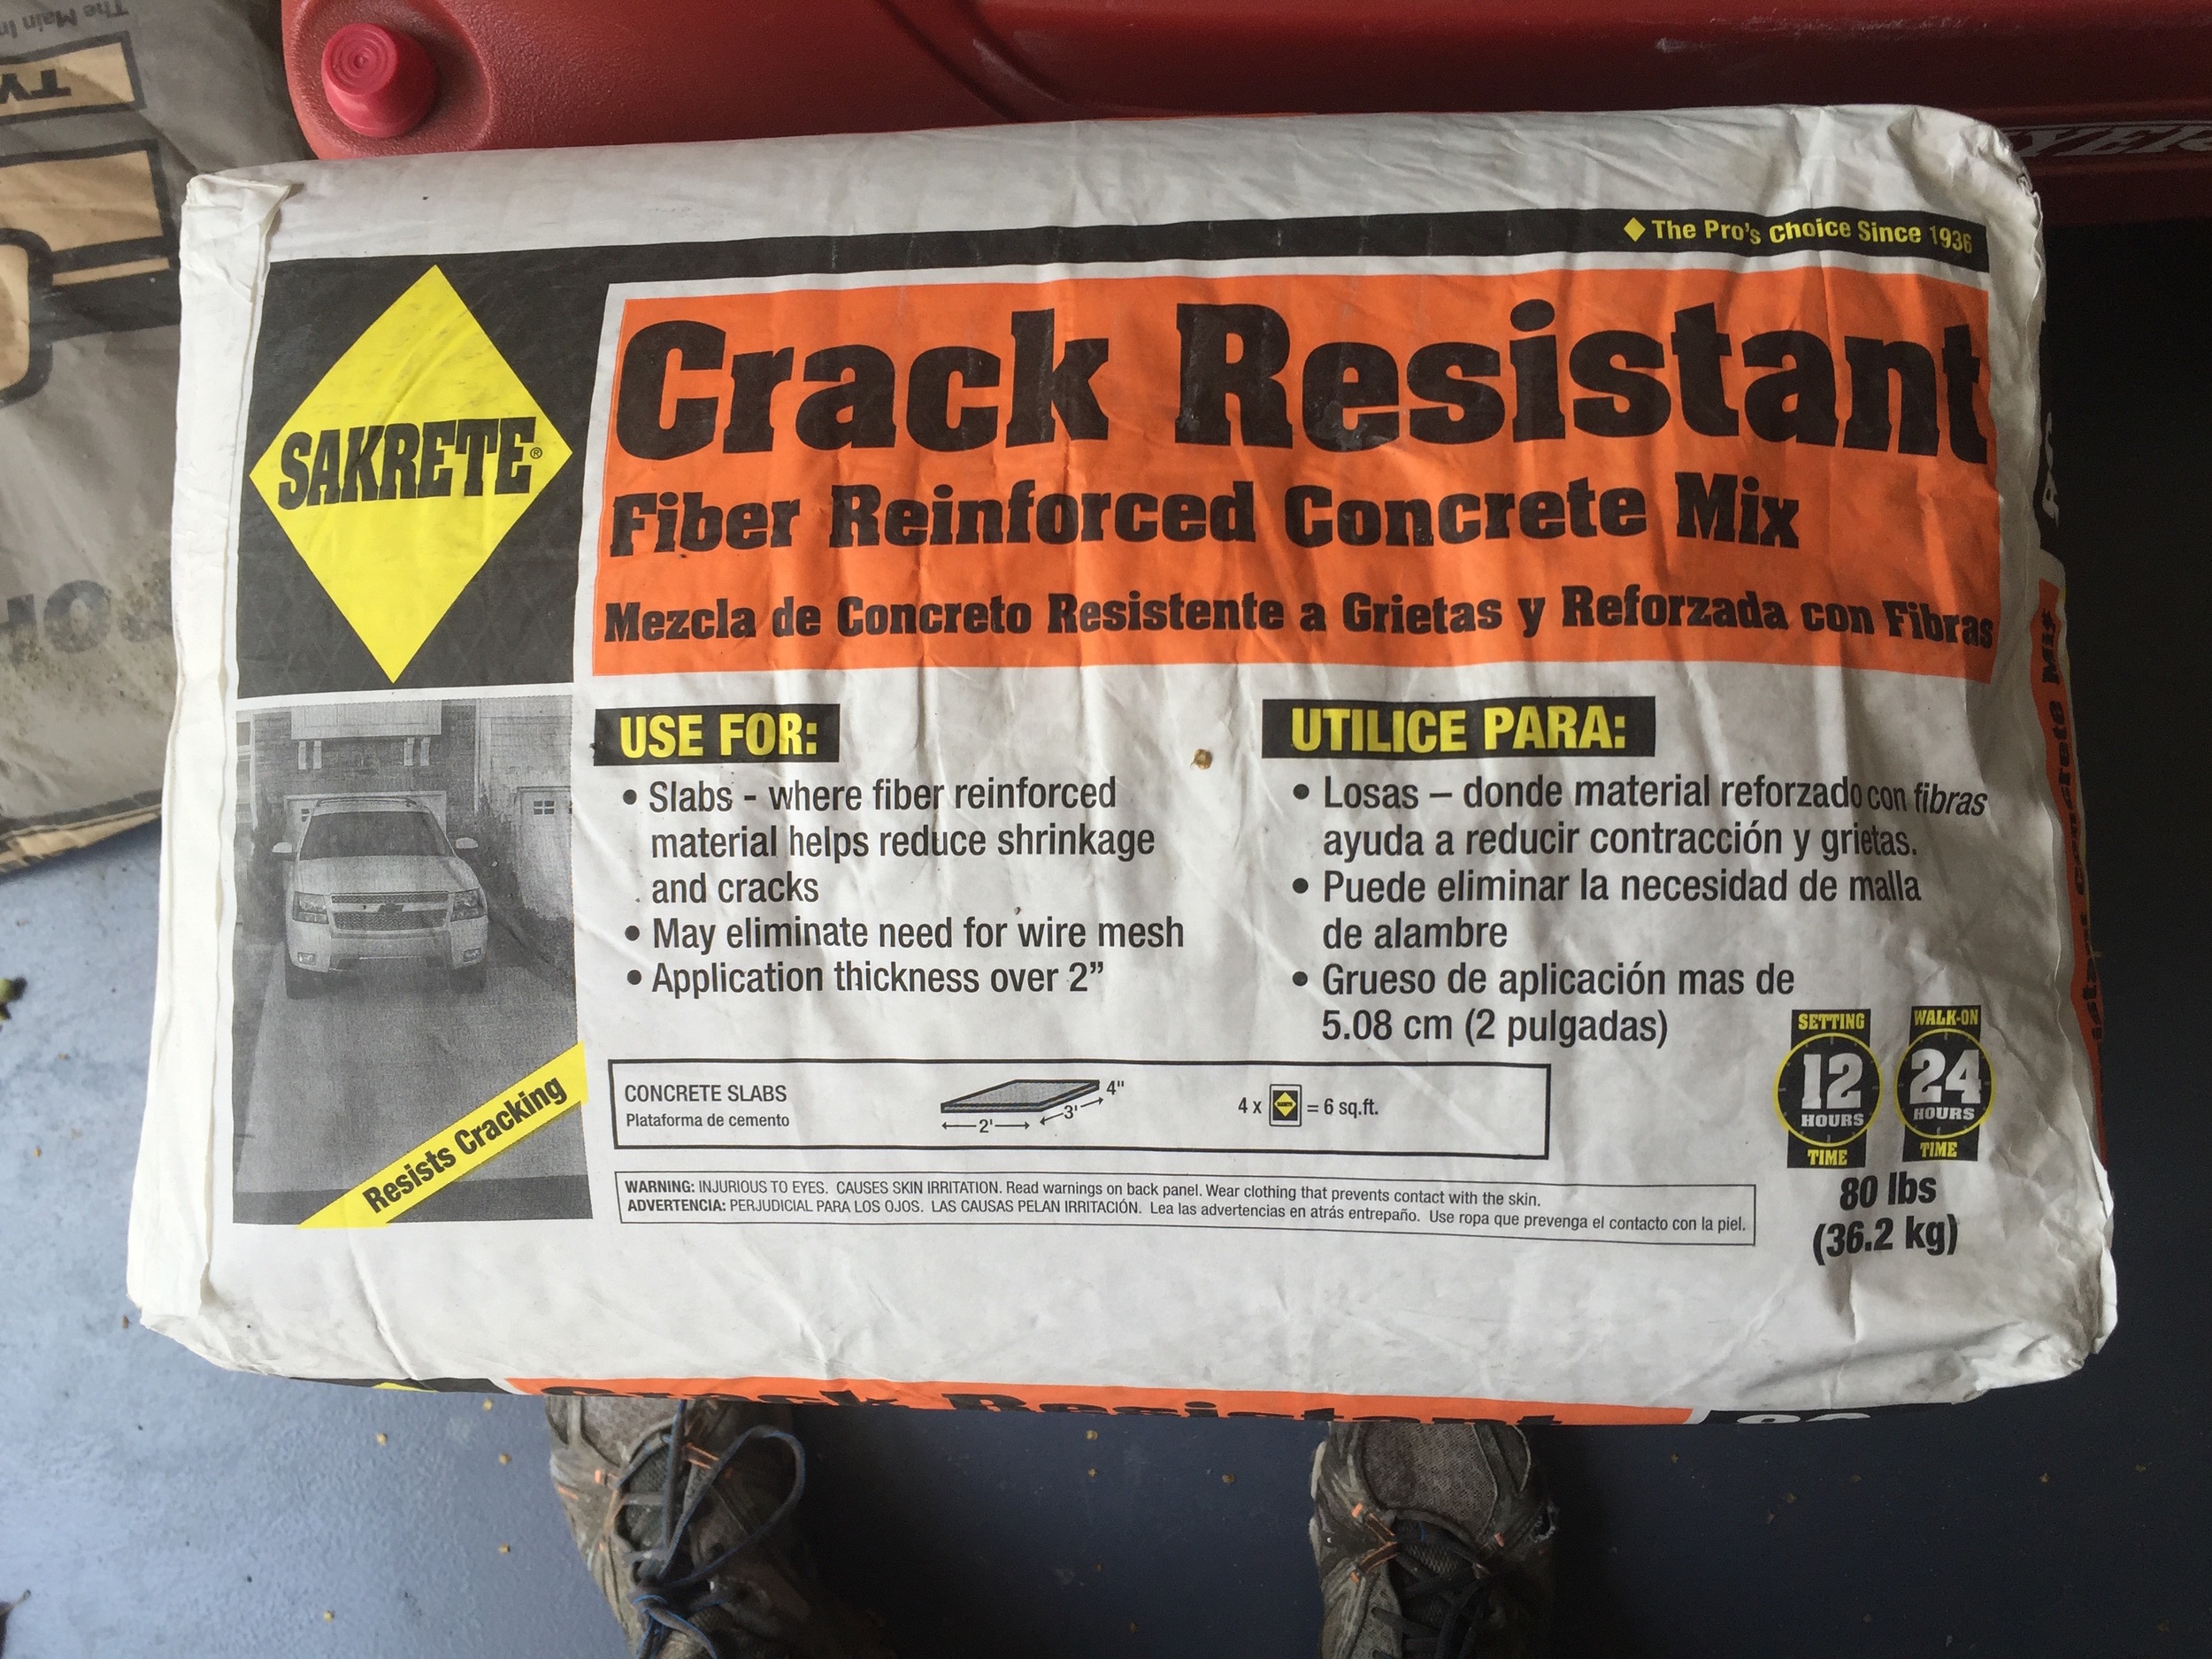
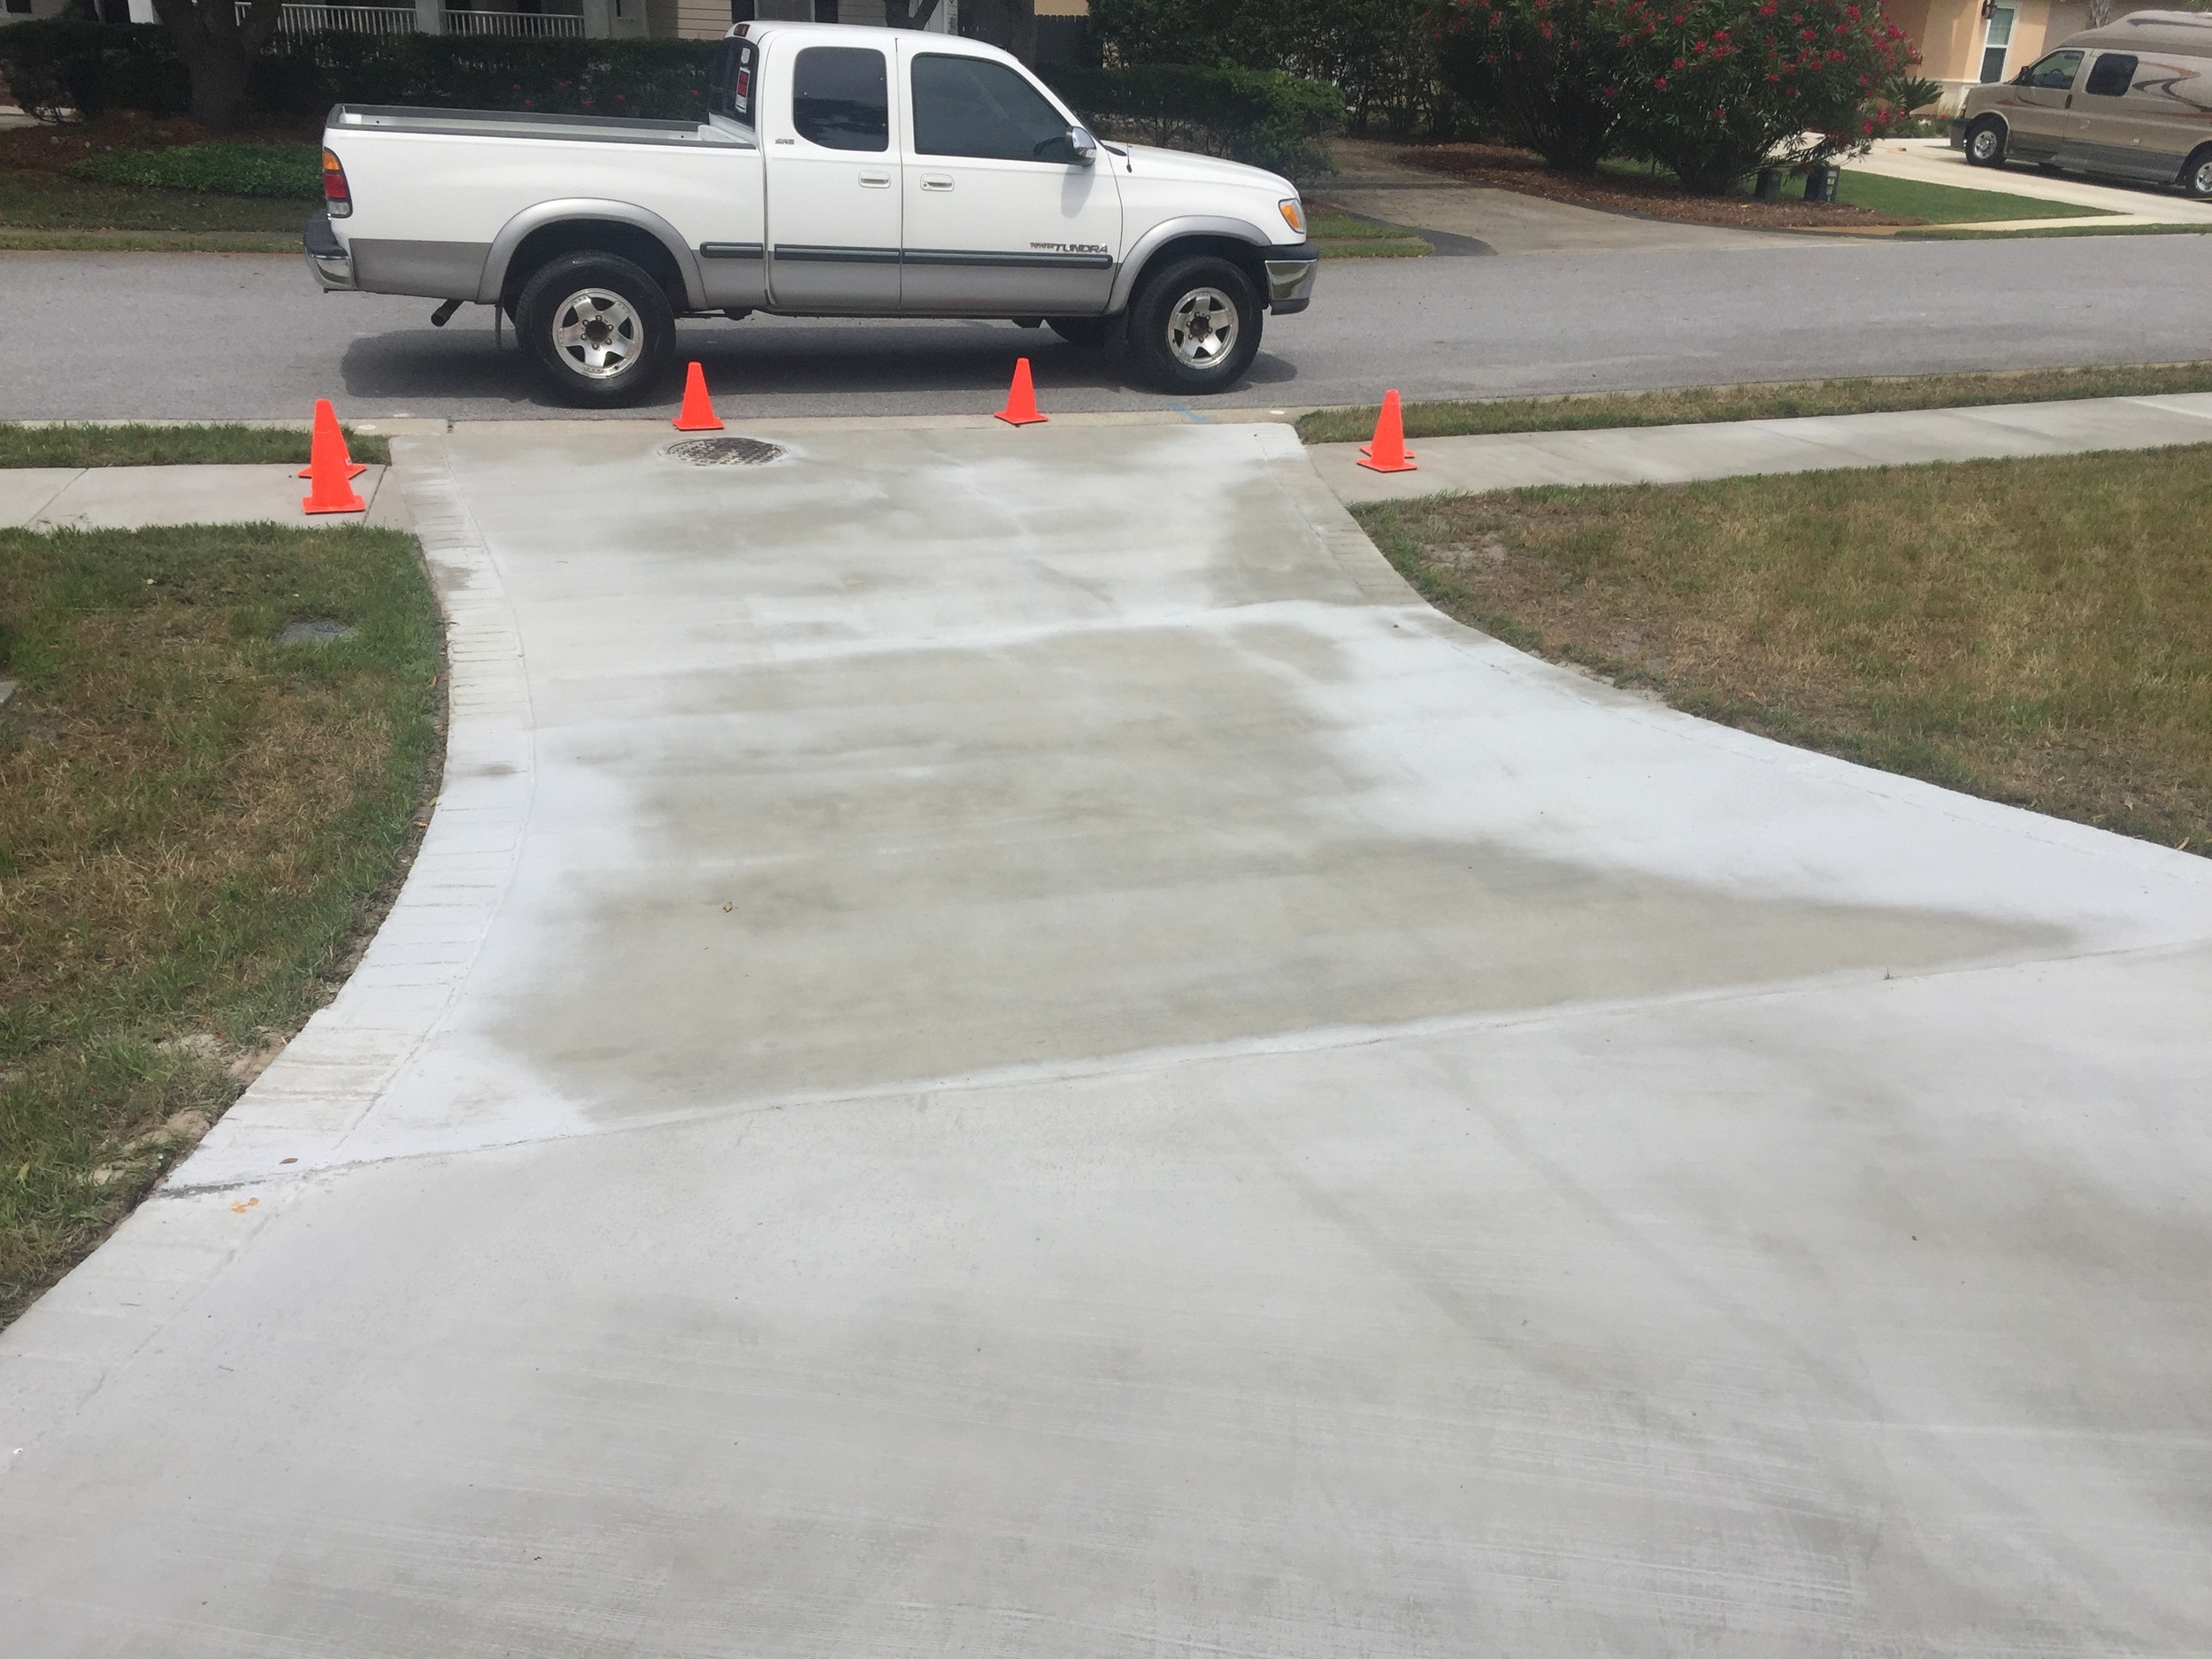
Here's a method that has been used maybe well over 200 years that most folks simply have forgotten and now spend thousands of dollars renewing a concrete surface. Way back before anyone alive today, people used to use limestone powder. They mixed it with water to create a paint and painted everything with it. This protected wood from sun, insects and decay. Those similar methods can be used today. For some reason people pouring concrete in Florida and slackers elsewhere don't use rebar and pore at 3 inch thickness or less and then everyone wonders why their concrete driveway lasts only 10 years on top of sand. Geee...I wonder. 50's - 60's alot of driveways didn't use rebar either but the concrete mixture was much stronger and it was poured at 4-5 inches or thicker. Although a higher percentage used rebar than today. Today if you want a newer looking driveway there are multiple methods you can take to accomplish this. 1: Spend 10k-20k busting out the old and pouring in new correctly. 2: Spend roughly 1k-6k painting it which will have to be done every 5 years anyways. or 3: DIY, pressure wash, repair cracks and paint it with portland cement which is the main ingredient of concrete. This cost $300 in material and a whole lot of labor. This will have to be done roughly every 3 years but you never have to seal it and doing this every 3 years your still not going to spend as much as other methods for the life of the concrete. Granted you can only do so much patching before it will all eventually need to be ripped out anyway. Here we had a corner that was broken off that needed to be built back up so we busted out the old, dug a 2 ft piling and re-poured with fiber enforced concrete. Since its part of the corner with vehicular traffic we didn't want it to break off again which was the reason for an overkill piling and a pour at 5 inches. Once repairs and cracks are complete then all you do is mix up the portland with a bonding agent (the white stuff), water and make your paint. Brush minimum 2 coats and boom new driveway for $100-$300 for 3-5 years. The more coats you add the more even it will look and will actually improve the strength and decrease wear time slightly. Hell, sometimes one coat looks better than original. Have fun.....breaking your back :)


Roof Repair
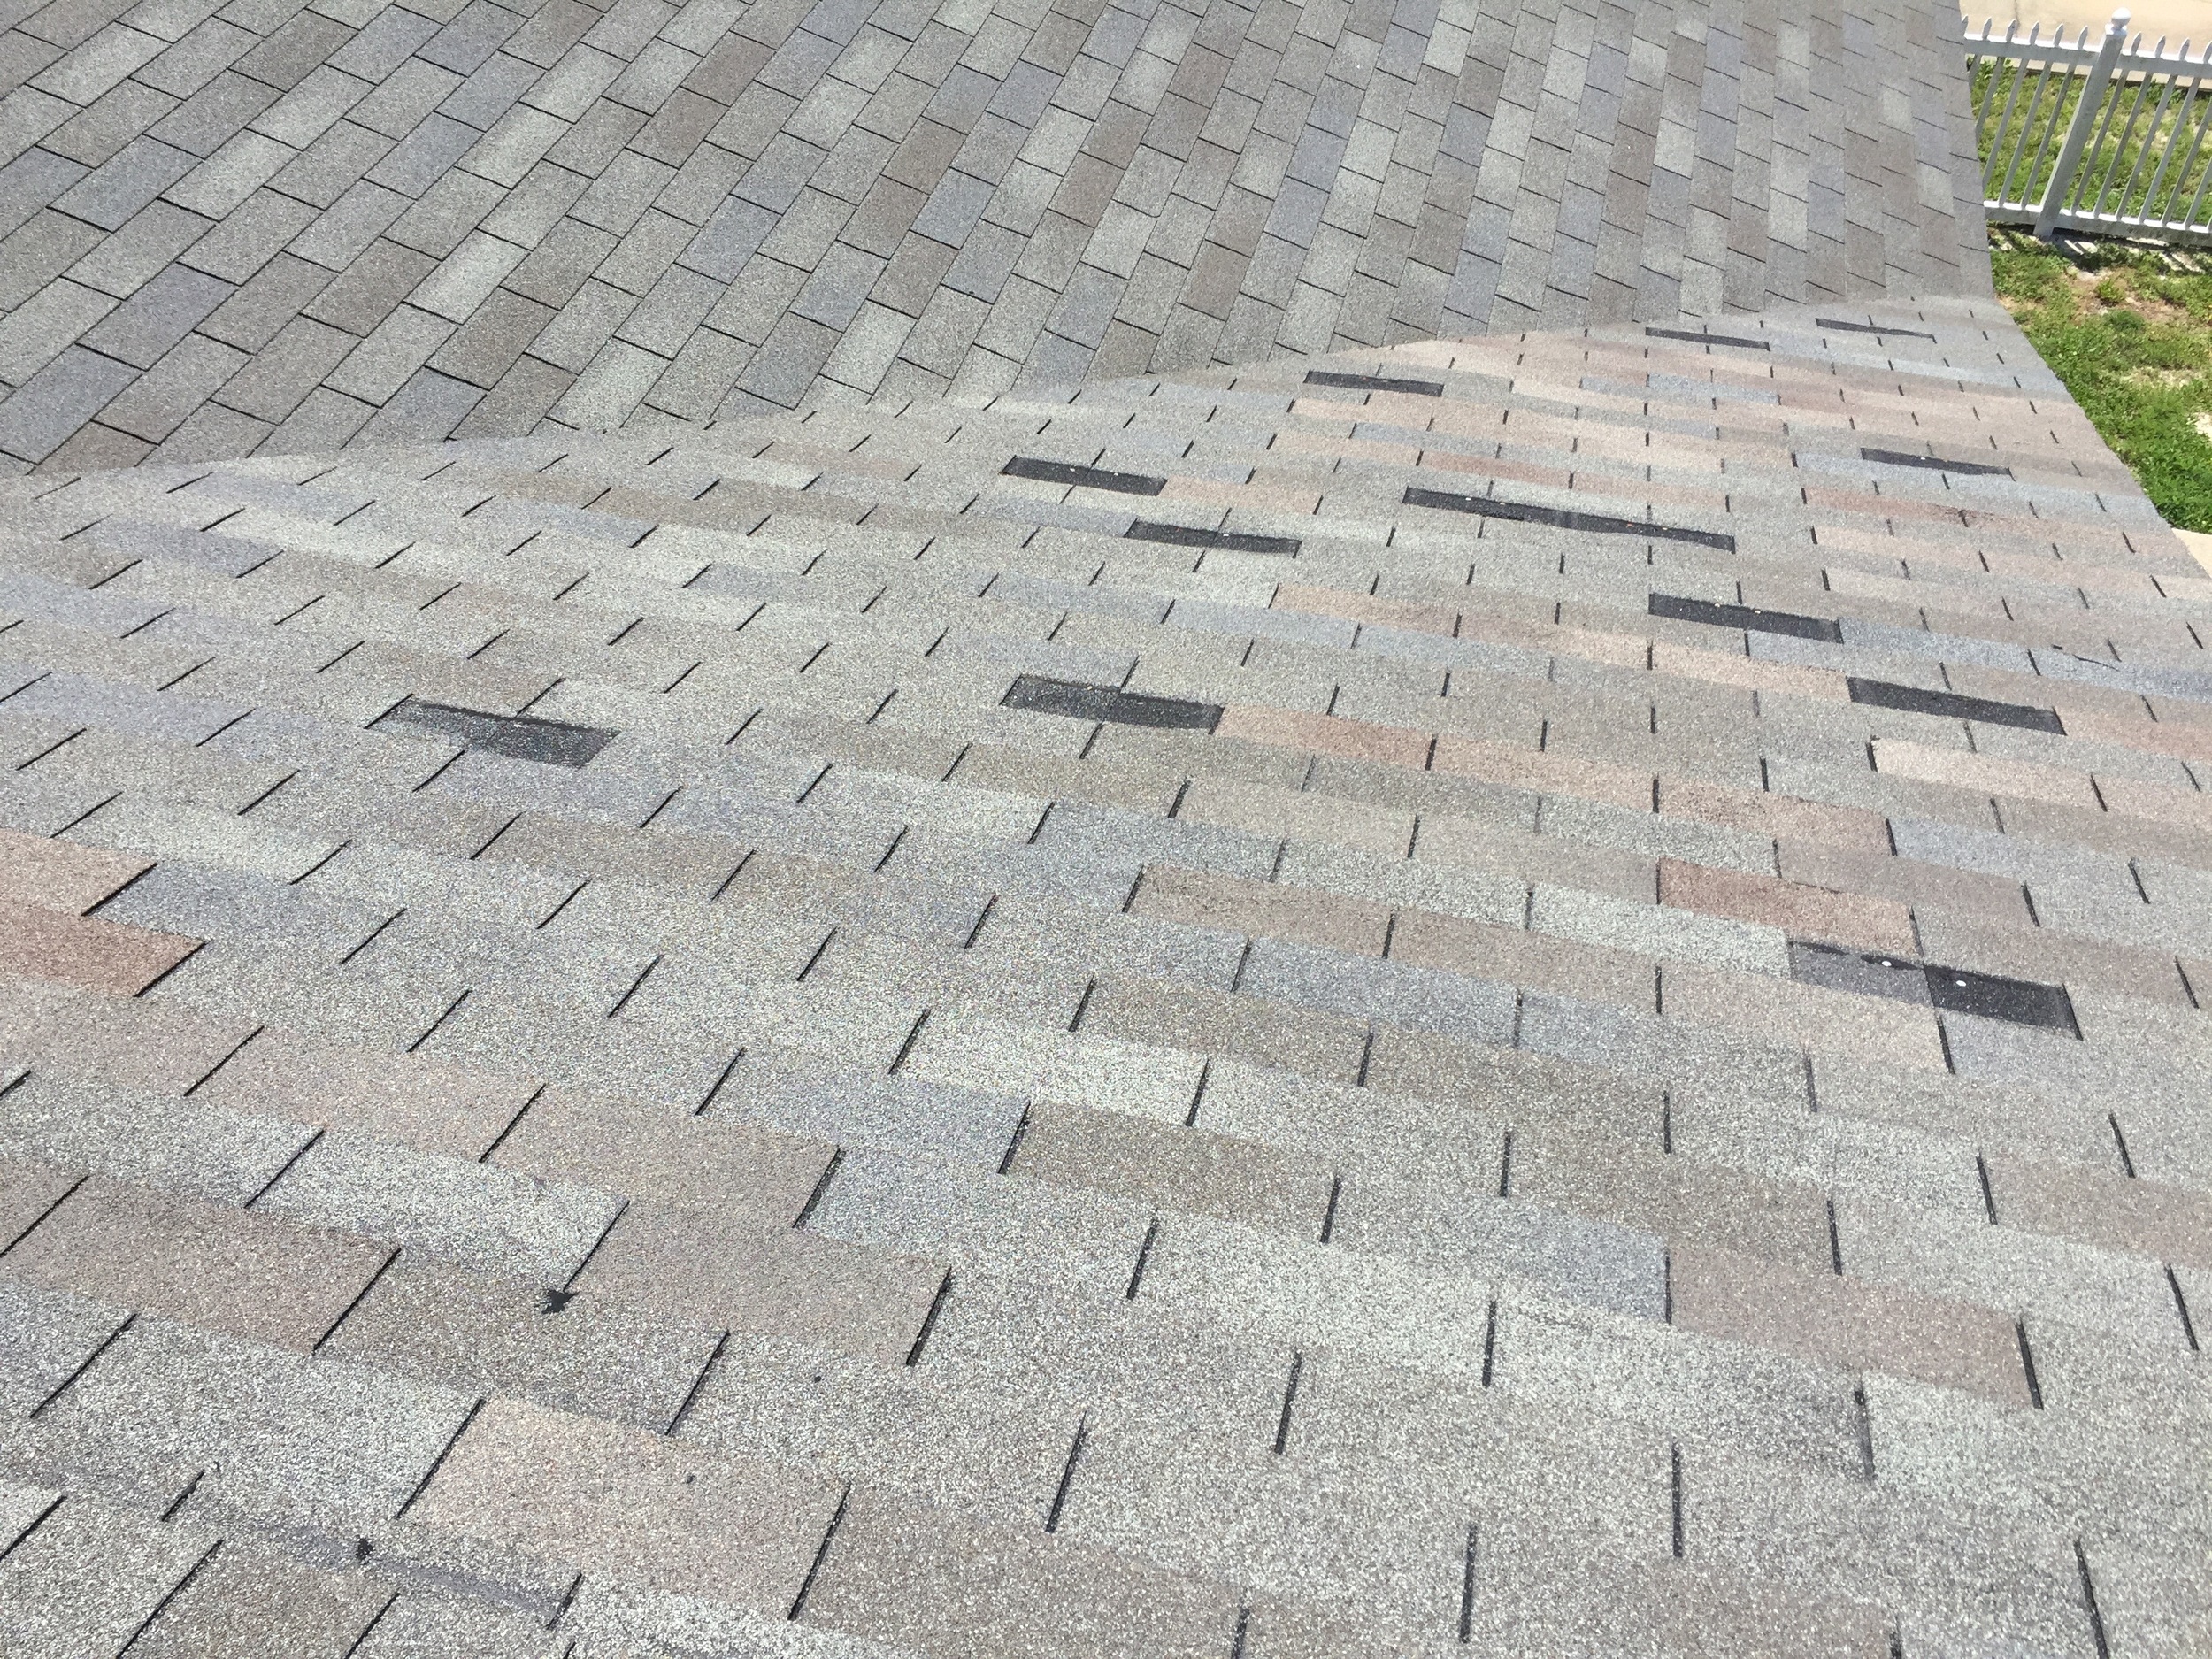
We've done this post many times, but it's been a while, they've been deleted, it's done every year anyways and we've got new audience members so here it is again. One of our roof's get's damaged at least once a year due to windy storms. It's on the beach and it has 3 tab shingles so they always get ripped out. Replacing shingles is pretty easy. First bring an old ripped one to your local hardware store and match the color with ones similar, then all you do is get a roof crow bar and pull the nails out loosen old shingles and pull the ripped ones. Install new by cutting to size and then add roof cement under new and old shingles which binds them together. Without adding the cement the shingles will just flap in the wind a rip off again, which we somewhat expect anyway's because we're out here doing this job over and over :). Remember to bring a hat and some knee pads, Even with all that your going to have your work cut out on this job. Think desert with hot molten shingles blaring in your face and burning your hands. Fun Times. Eventually when it comes times for replacement we'll replace with dimensional shingles which are one full piece eliminating the 3 tab flap in wind. Problem solved. Oh yeah.. DIY About $40, Hire it out...$300-$600. Ready to get your hands bloody?


Tub Drain
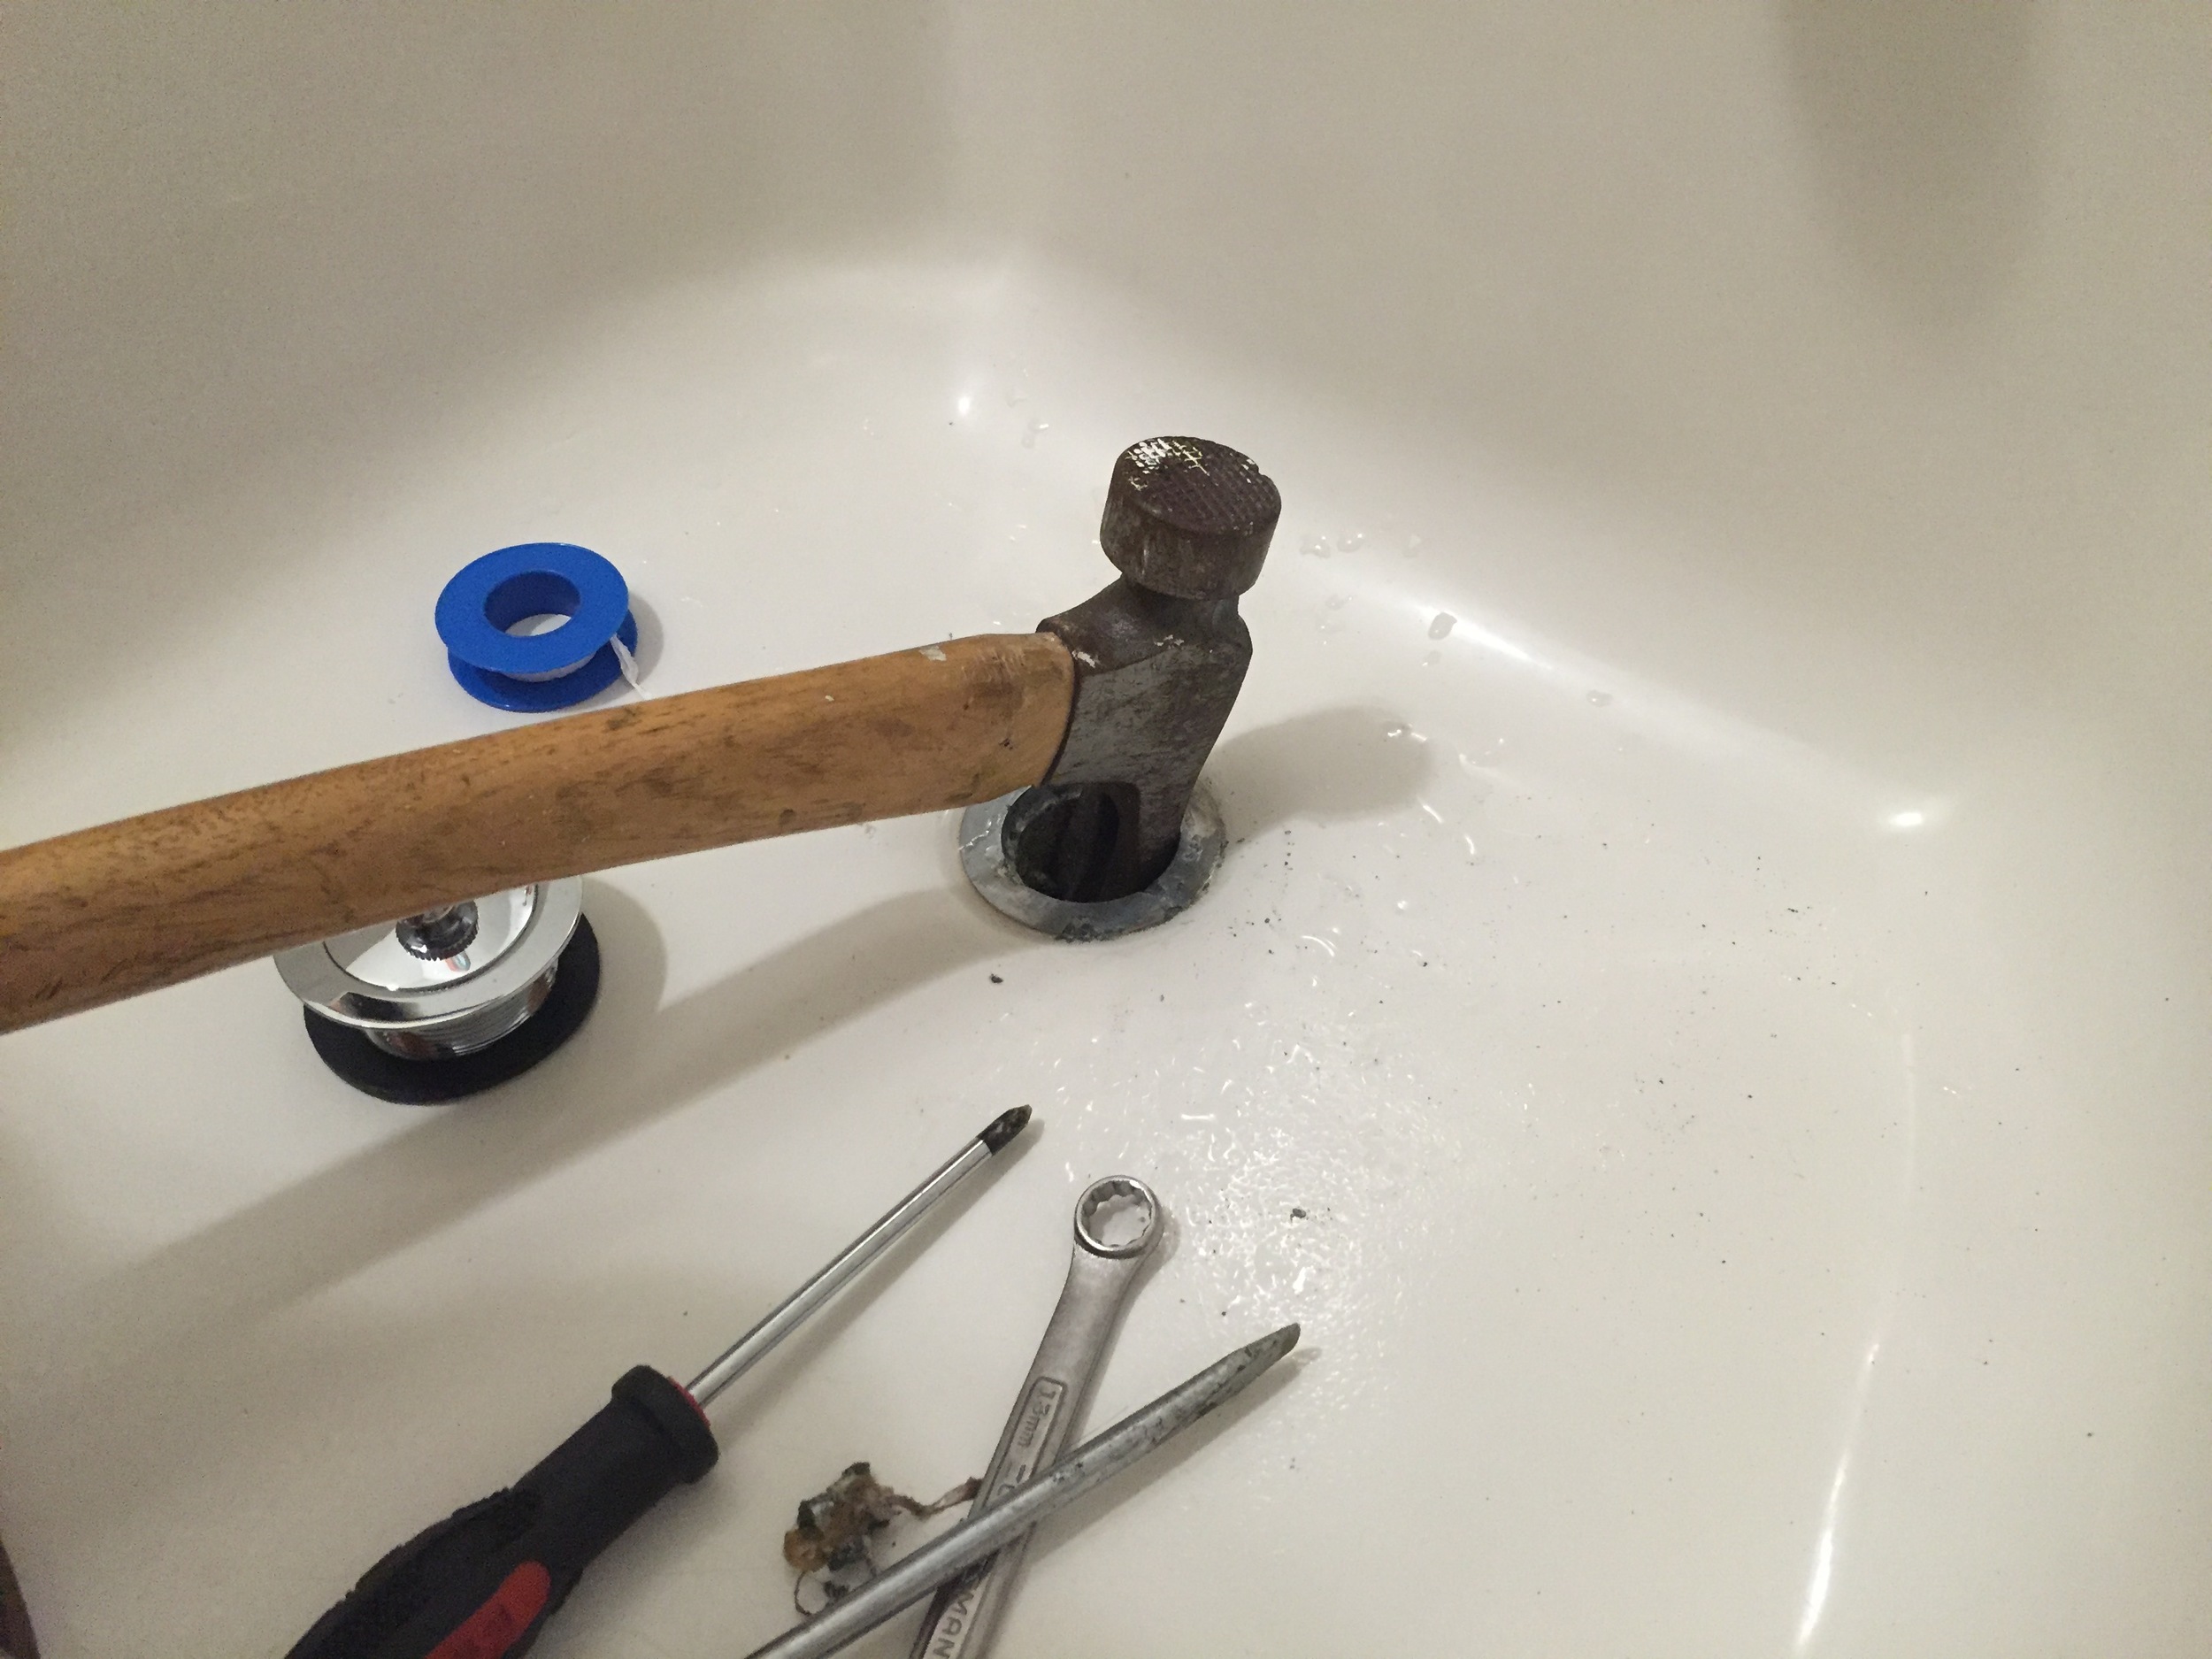
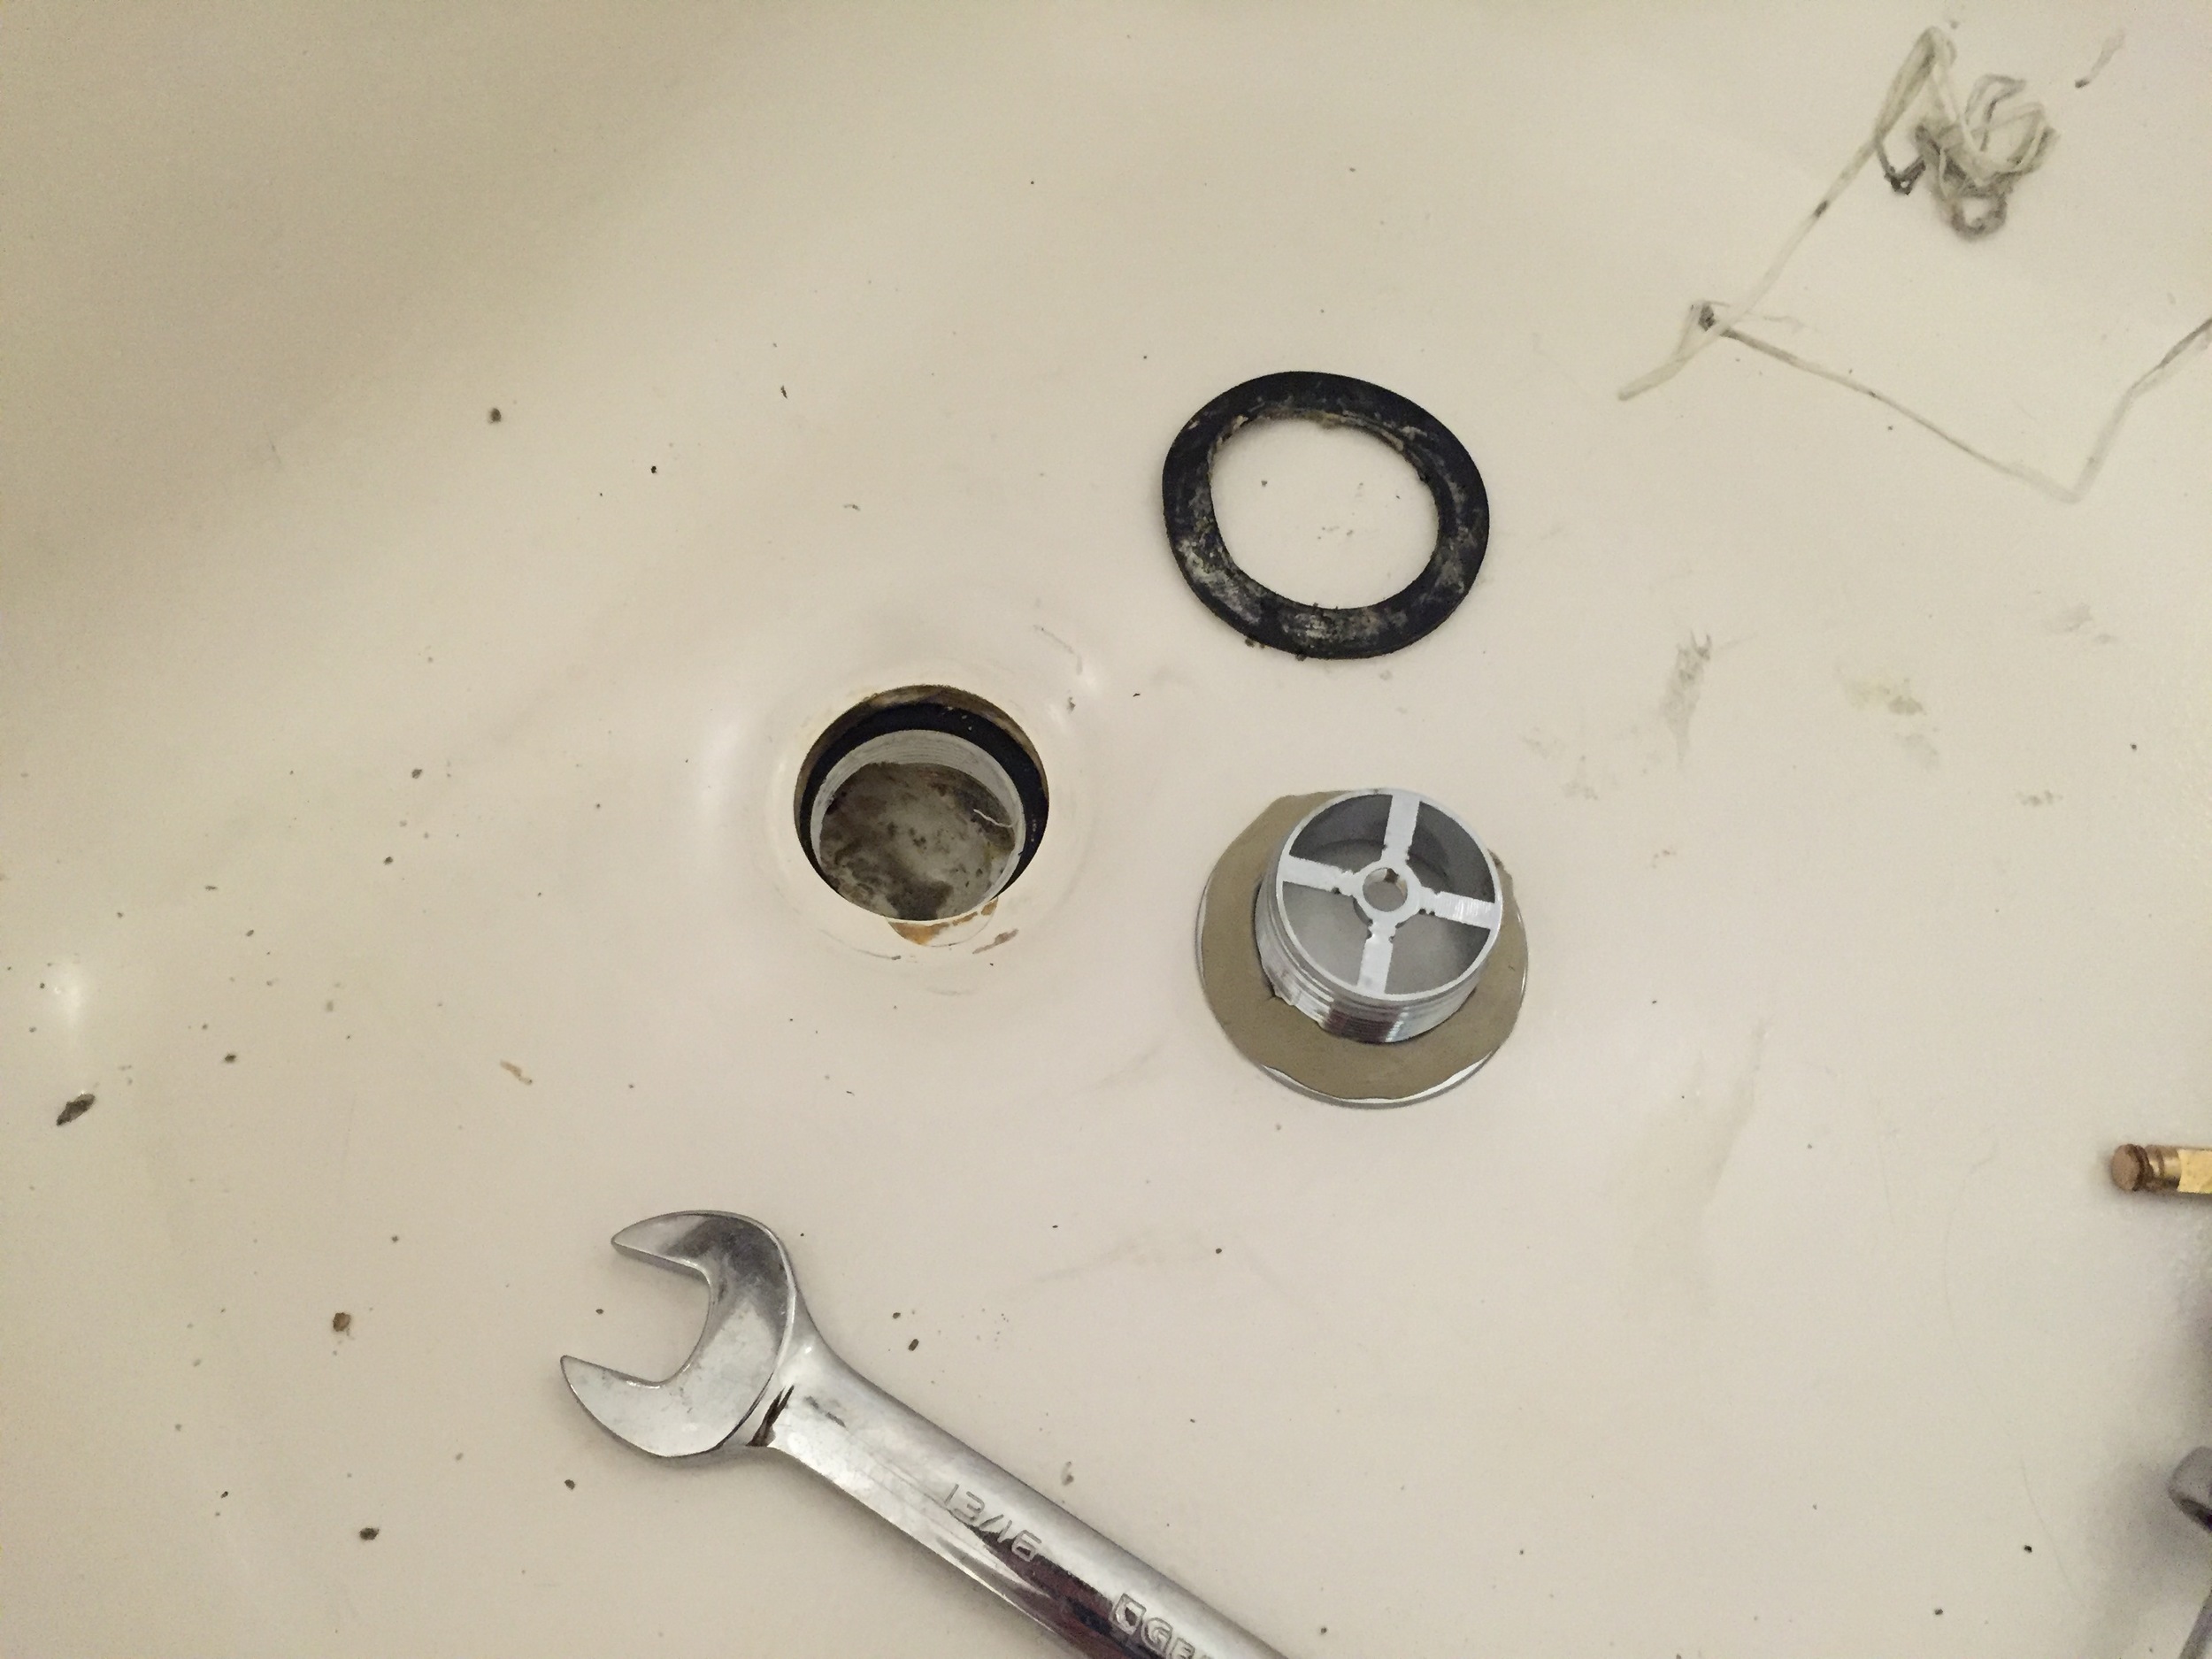
There's a tool for everything, but do you really need that tool if you're going to use it once or twice in your lifetime? If you're like me you must have that tool...like all of them! However, that's not going to stop us from trying that "whatever's around me I'm going to use" method. Take this tub drain for instance. Usually these things get stuck from sitting there for decades and it takes quite a bit of force to loosen one up. Here are multiple ways that usually work. 1) Big screwdriver and a wrench. Place the wrench in the cross beams of the drain, the screwdriver in the wrench and lefty loosey. This method broke the cross beams. 2) Hammer and leverage. Use the nail puller end of a hammer, place it in the drain pull up and lefty loosey. This method slipped. 3) Place a 32mm socket on a high torque hammer drill, wrap electrical tape around it, then place a drain, press down hard and left loosy. This method usually works but man this thing ain't budging! 4) Well, guess we gotta use that special tool. A drain puller has a nut on one end. You place the tool inside the hole and as you rotate the nut lefty loosy the metal grip expands inside the drain making it grip. The harder you tighten left the more the tool grabs the drain. At this point you can you usually place your 32mm socket on the nut and use it with your hammer drill but even doing that this thing wouldn't budge. In the end it was the tool and a long adjustable wrench that finally loosened this guy up. Once you've got it out. Pull the rubber seal, clean the area, replace the rubber seal, apply plumbers putty around the new drain and righty tighty! You're done!


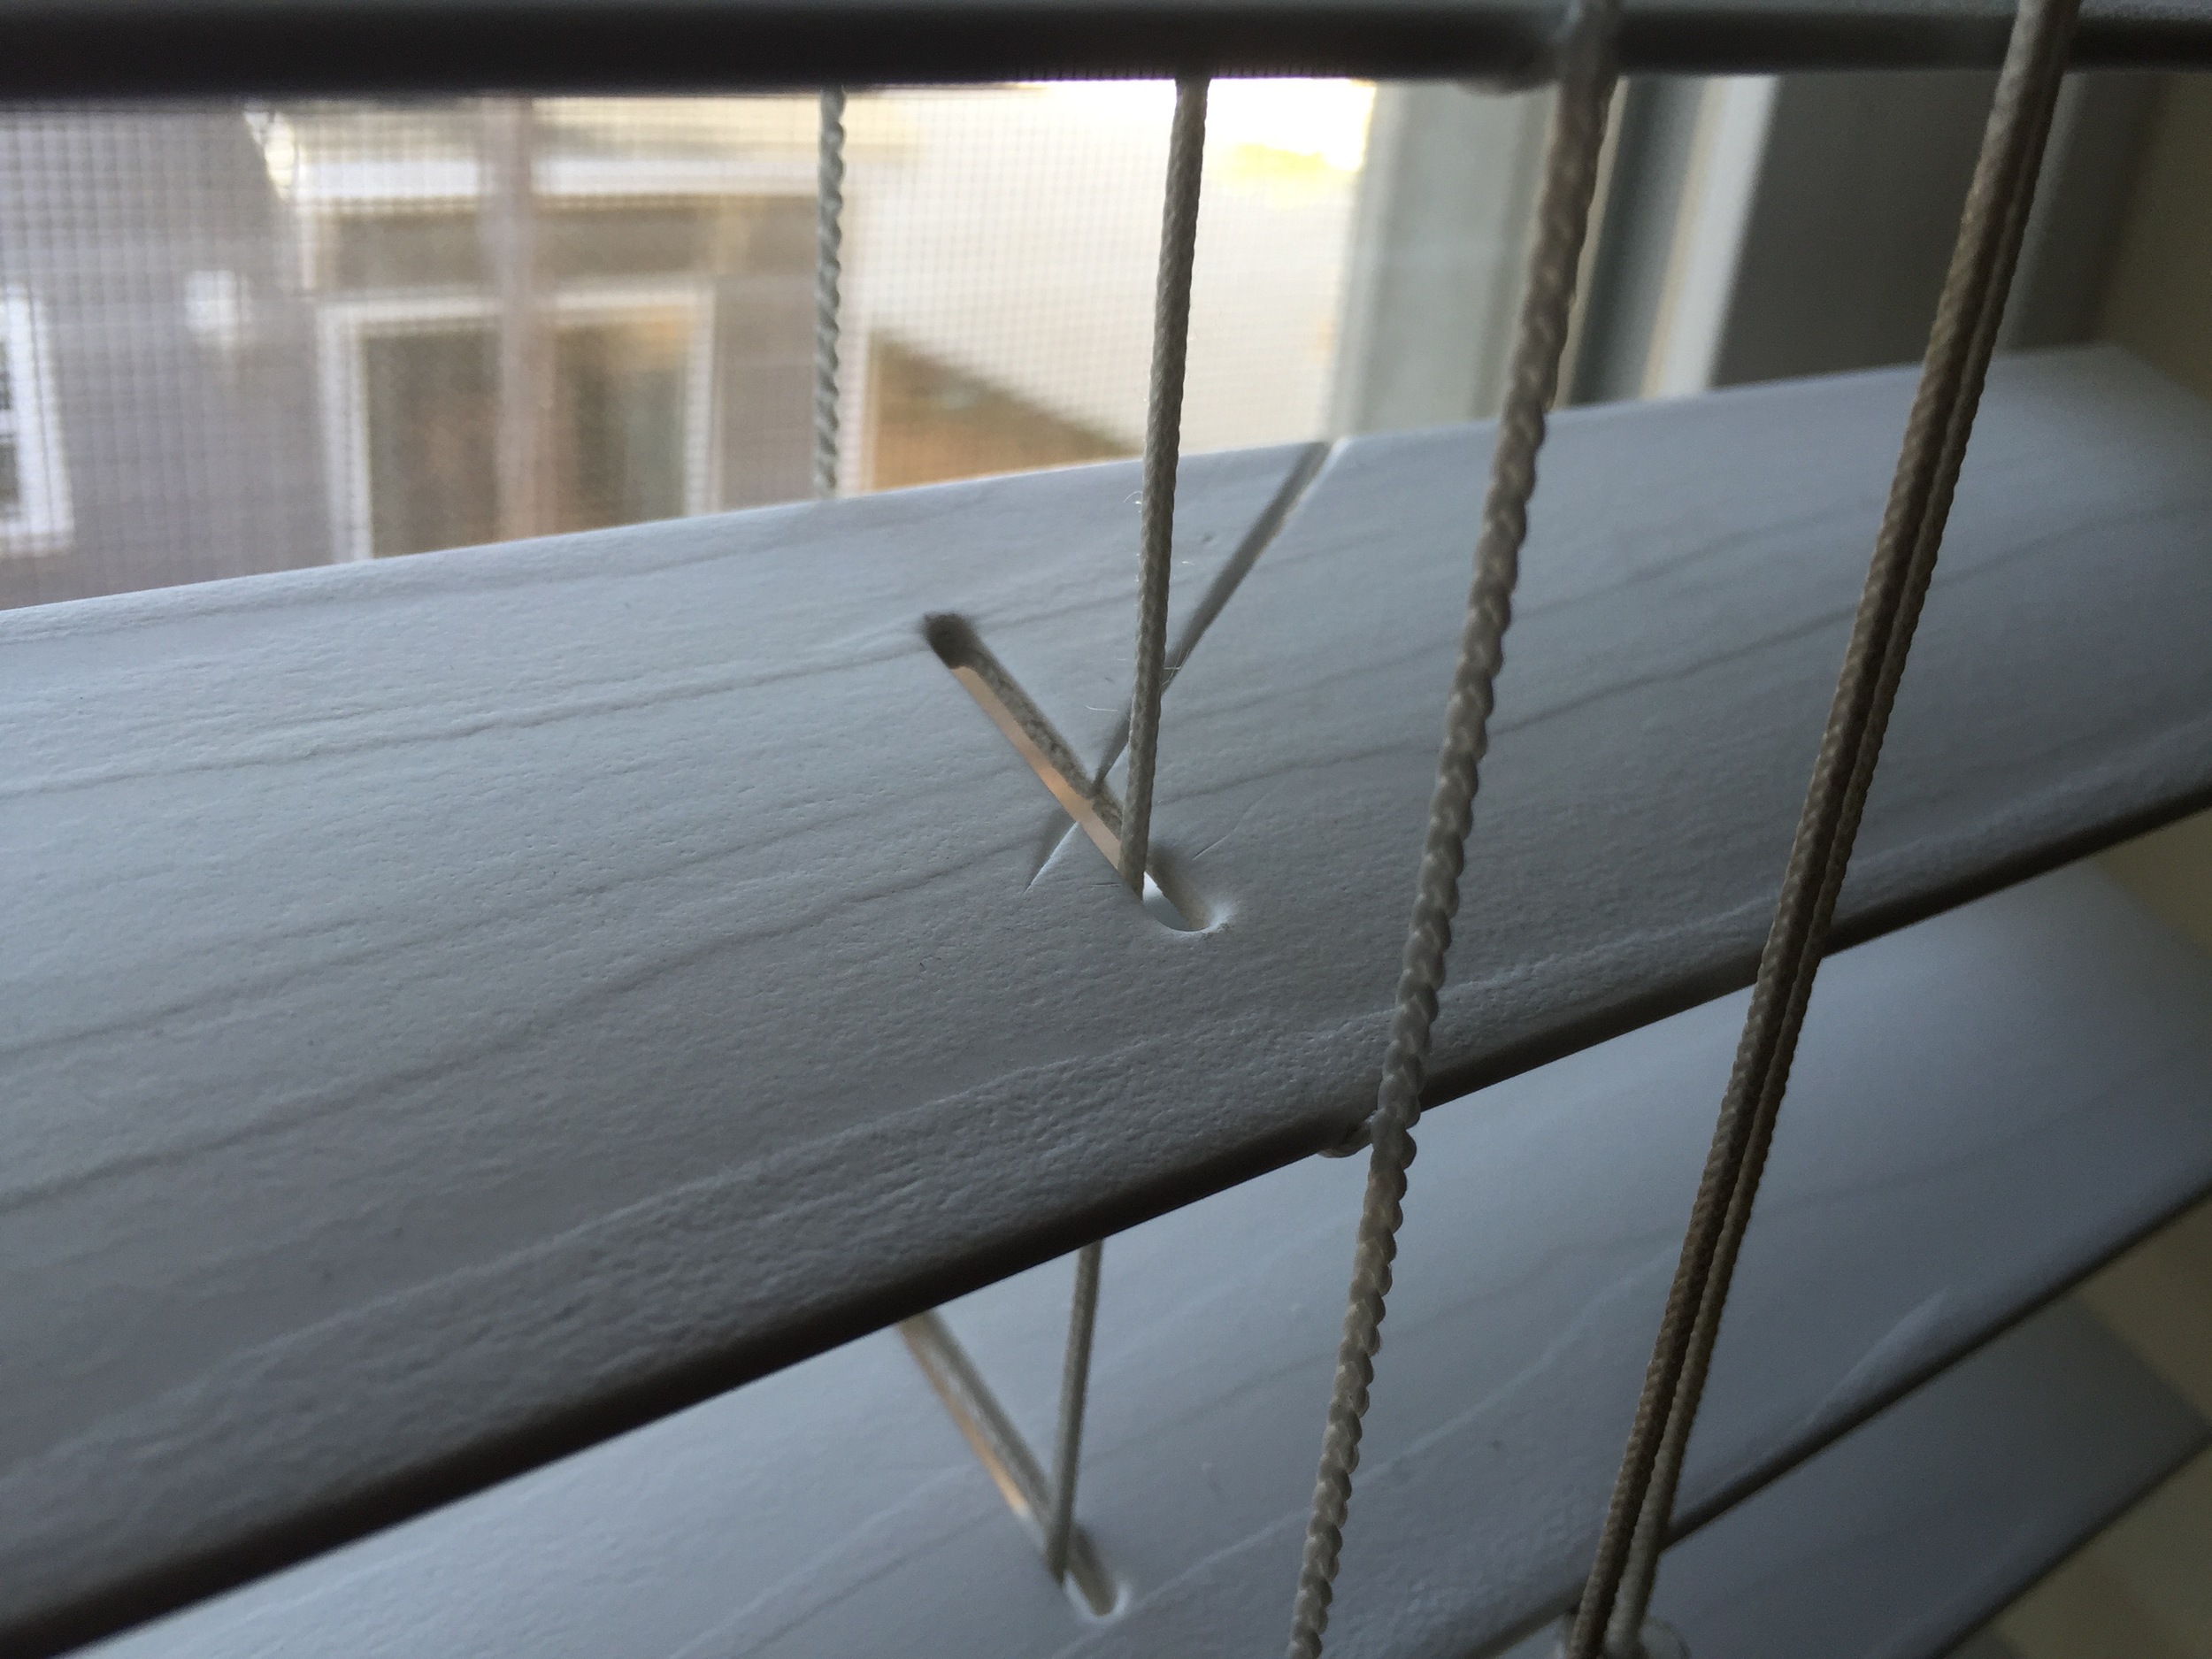
Blinds Trick
So somewhere along the line a cat jumped up, a child pulled it down, or an adult that acts like a child bent or broke some blind blades. Here is a quick trick that works for Faux wood, aluminum or vinyl blinds that replaces the blade that has been woven into the pull strings. This saves $100's of dollars especially with the more expensive thicker blinds. You take some spare blades or if you're throwing one blind away you use it as your spare. Cut the string and pull some blades out. Cut a 45 degree slit where the pull string would go. The reason for the 45 degree cut is so when you replace the blade the string that holds the blade up has something to rest upon. Cut the old blind out without cutting the string. Insert the new blade and boom your done. There are other ways to do this that require a bit more time that don't involve cutting the blade and removing the string but this tutorial is that, "oh snap I've got like 5 min before I gotta run" fixes. Onward!


Teacher! Teacher! I built a clock! #ITTT #IOT
Ha Ha...Nahh, I'm just playin :P So you've got that electric water heater, you know that tank that stays on 24/7. There has got to be a way to save money with that thing without ripping it out and replacing it with a more efficient one right? Right you are. Gulf Power has devices such as the one provided in pics below that do similar things but you have to go through some big company to make it work and have to use their software.... Sounds like a pain in the ass to me. So basically you buy all these parts, you connect all the wires and then all of a sudden you have an app on your phone with timer and you can turn on and off your water heater while on vacation and turn it off during long hours if not in use. We basically set it to be off between the hours of 10pm and 5am, which should save us an avg of 180 hrs a month as a complete calculated guess. When starting a project like this make sure breakers are turned off. Playing with electricity is no joke. 120v could possibly kill you depending on where the electricity travels through your body. 240V will blow body parts off and lets just go ahead and say YOU WILL DIE...Don't play with it, It WILL BITE you...so make sure you have the proper precautions and tools in place before you even think about doing this yourself. We're all about DIY and don't let unwanted laws that you were born into and did not vote on breach your property line, but it has its limits. You are the limiter and its on you should you screw up. With that out of the way you can purchase all parts on Amazon and the wiring diagram is provided. The only trouble we had was with the fuse box so you might have to run to a local hardware store to get that working as the fuse box we ordered did not fit the fuses we had. As far as options on how to turn on/off the device remotely there are multiple ways. Option 1: timer, Option 2: connecting the wifi switch to your thermostat sensors using ITTT and option 3; turning on within a certain distance of your house using GPS and ITTT. Of course if you're single option 2 and option 3 could be put to use but from our testing it is delayed 10-15 minutes. If you have multiple people under one roof with the craziness that life brings option 1 might be the best bet. If you're wondering what IoT ITTT (Internet of Things / If This Then That) is I suggest you visit the site (https://ifttt.com/recipes) to learn more and see what you could do to save yourself more money and more time so you have more money and time to do whatever the hell you want....Like baby making and getting free stuff from Facebook and Microsoft and a bazillion dollars from Tax Payers for making a bom....Crap I meant clock! Cheers!
For our Residents: This will be in testing for over a year to make sure it is safe so we won't be implementing this one anytime soon. Safety First!


Ecobee 3 Review
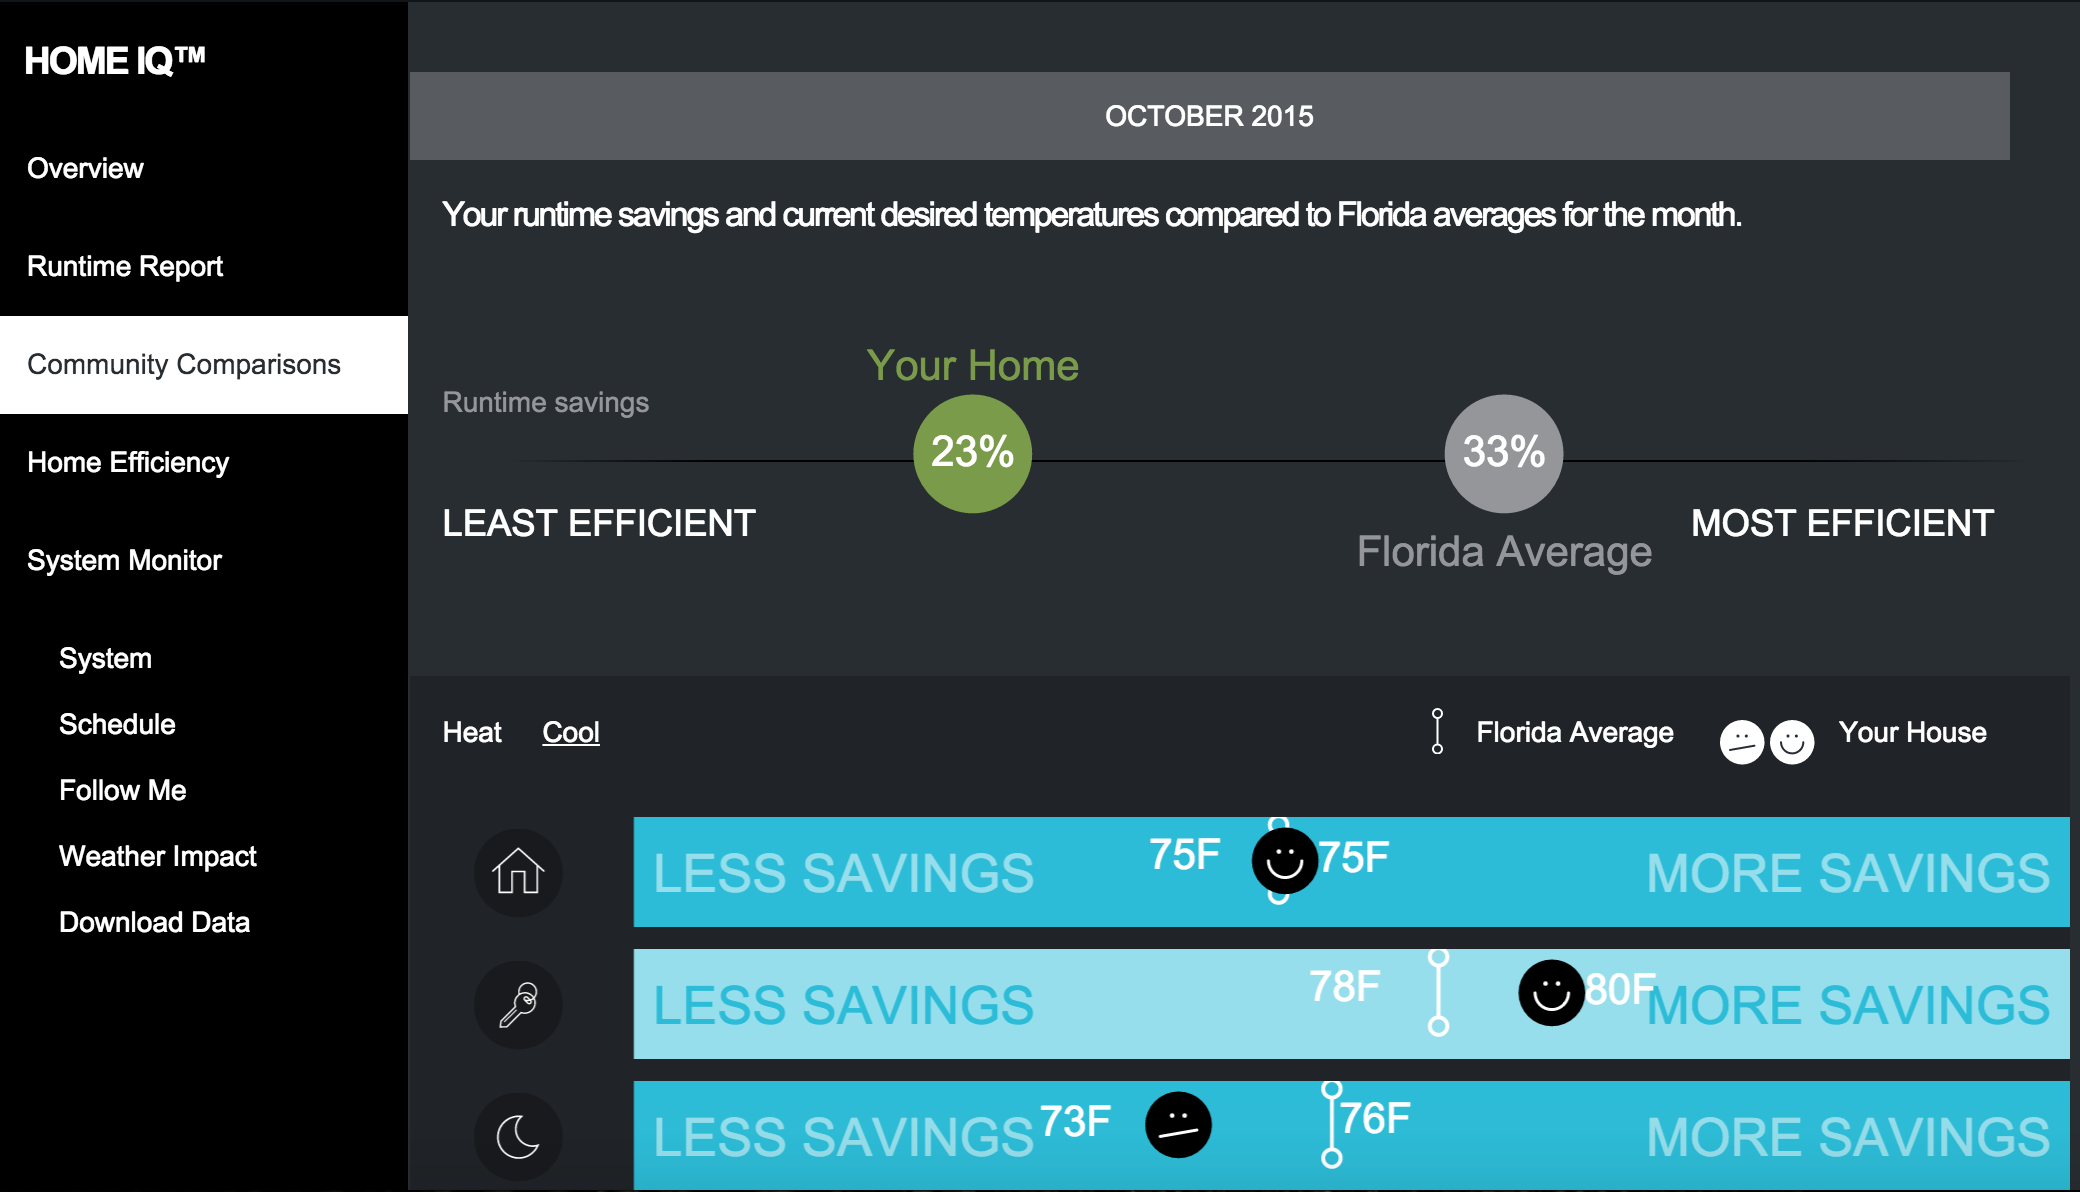
We've reviewed smart thermostats before and have a couple installed in our properties. Specifically the digital Honeywells with vacation and timer built in but major leaps have occurred since then and none that have been connected back on wifi with sensors! The Ecobee 3 does just that. It comes with 1 sensor but we tested 3 and the unit itself. You easily install it and set it up. If you need help the #800 number is very useful and their tech support is flawless down to troubleshooting your wire runs...over the phone! Nice. Once installed you place your sensors in rooms desired and setup home, sleep and away settings. If you have a couple of rooms that are hotter or colder than others the sensors will average your home out so that no longer becomes an issue. They sense where you're at and inform the thermostat to keep your setting based on the room your in. Of course sleep mode you'd set your bedroom with no motion or a combination of sensors. It works very well and it's saving energy for the heating/cooling unit from anywhere between 15% - 25% which is huge depending on the sq footage area its covering. I believe we were only getting 10% or less 8 years ago with the Honeywells, but don't have the data hanging around and the data scenario and sq. footage was completely different. Whats really great about the device is the cloud software called Home IQ. It will spit out monthly reports informing you how well you did on effeciency compared to others in Florida and spit data out so you can change some settings to improve that rating pending your comfort level. You can even download all this data to Excel and crunch data to get highly detailed information for future changes in settings for those of you that like to cherry pick. Overall, excellent energy saver. Every year these devices are doing more and more taking a load off the grid more and more and saving the consumer more and more. MOAR!!! Lots of future potential and if anyone is asking, tell them a Nest is for birds!
For our residents:
Option 1: If you want to purchase one and replace your current thermostat go ahead. Just put the old one back when you leave. Hint take a pic of the wires before you remove and replace for reference of colors on where they go. If you break it you buy it. Thermostat and a/c unit. So if you feel uncomfortable hire it out or don't do it.
Option 2: Unit tested with 3 sensors was $300 + shipping. If you pay $150, we'll pay the rest and install it, but it stays with the property when you leave.
Let me know


Planning & Communication
When starting any project you always want to have a start to finish plan with communication to your team. Write it down on a napkin on your hand on anything, just write it down! This plan should include all individuals involved along with planning for future unknowns. The better you become at this process, the longer your projects last and potential future unknowns become lower to non existant. Sometimes...actually always, you can't play God and prevent all issues but you can do the best of your ability. In this case communication between an irrigation guy and a landscaper was low to non existant. The irrigation lines were ran and then a big palm was planted right on top of the line. It took roughly 10 years and the line broke. The line was re-plumbed around the palm bulb and sprinkler head pushed back. Not a big issue but double work doesn't need to be done with better planning. Plan well.


Rachio Review
So the whole "smart" thing seems to be trending. Considering building materials and those involved are getting "dumber" it's refreshing. Here's my good, bad and take away from the experience on the device. The rachio is an irrigation controller that hooks up to your wifi and off to the cloud. You easily install it, program zones which include spray head type, slope and soil conditions based on your area. Basically you set what you think it should be watered and with certain options enabled the rachio smart system takes over via syncing up with a local weather station. After a good 3 months of use it is saving thousands of gallons of water and trains your root system to grow deeper so your lawn is more drought resistant (with the help of yourself playing with settings). You can turn your system on/off with your wife in the yard, check stats from your phone and even turn your sprinklers on in say Japan...Freakin awesome. It adjusts how much more or less the grass needs to be watered based on seasonal changes (length of day, humidity, solar radiation, wind speed, etc.) and alerts you to those changes as well as switches off and skips run times when it rains currently and a 48 hour window.
The Good: Excellent system, lawn looks great as long as I stop playing with the settings. Looks better than over watered. Saving thousands of gallons which means payback coming up soon.
The Bad: It's not property specific. What if I want my data to stay on my property? What if some overlord retard woke up took a piss, looked out his window and decided it was to hot and global warming was going to kill us all and decided he was going to turn everyones sprinkler system off...
The Future: I'd like to see soil sensors that could be placed throughout the property that pinged the Rachio device to have my own cloud. This would be more accurate as moisture data would be pulled directly from property and information could be pulled from weather station keeping the "smart" data on the property. It's my data, so I say Mr. cloud...Get off my lawn!
Conclusion: Awesome device, but keep an old school backup due to future of company unknown (servers going down), which means your system goes down and sprinkler commies. Otherwise, great purchase. Buy it!


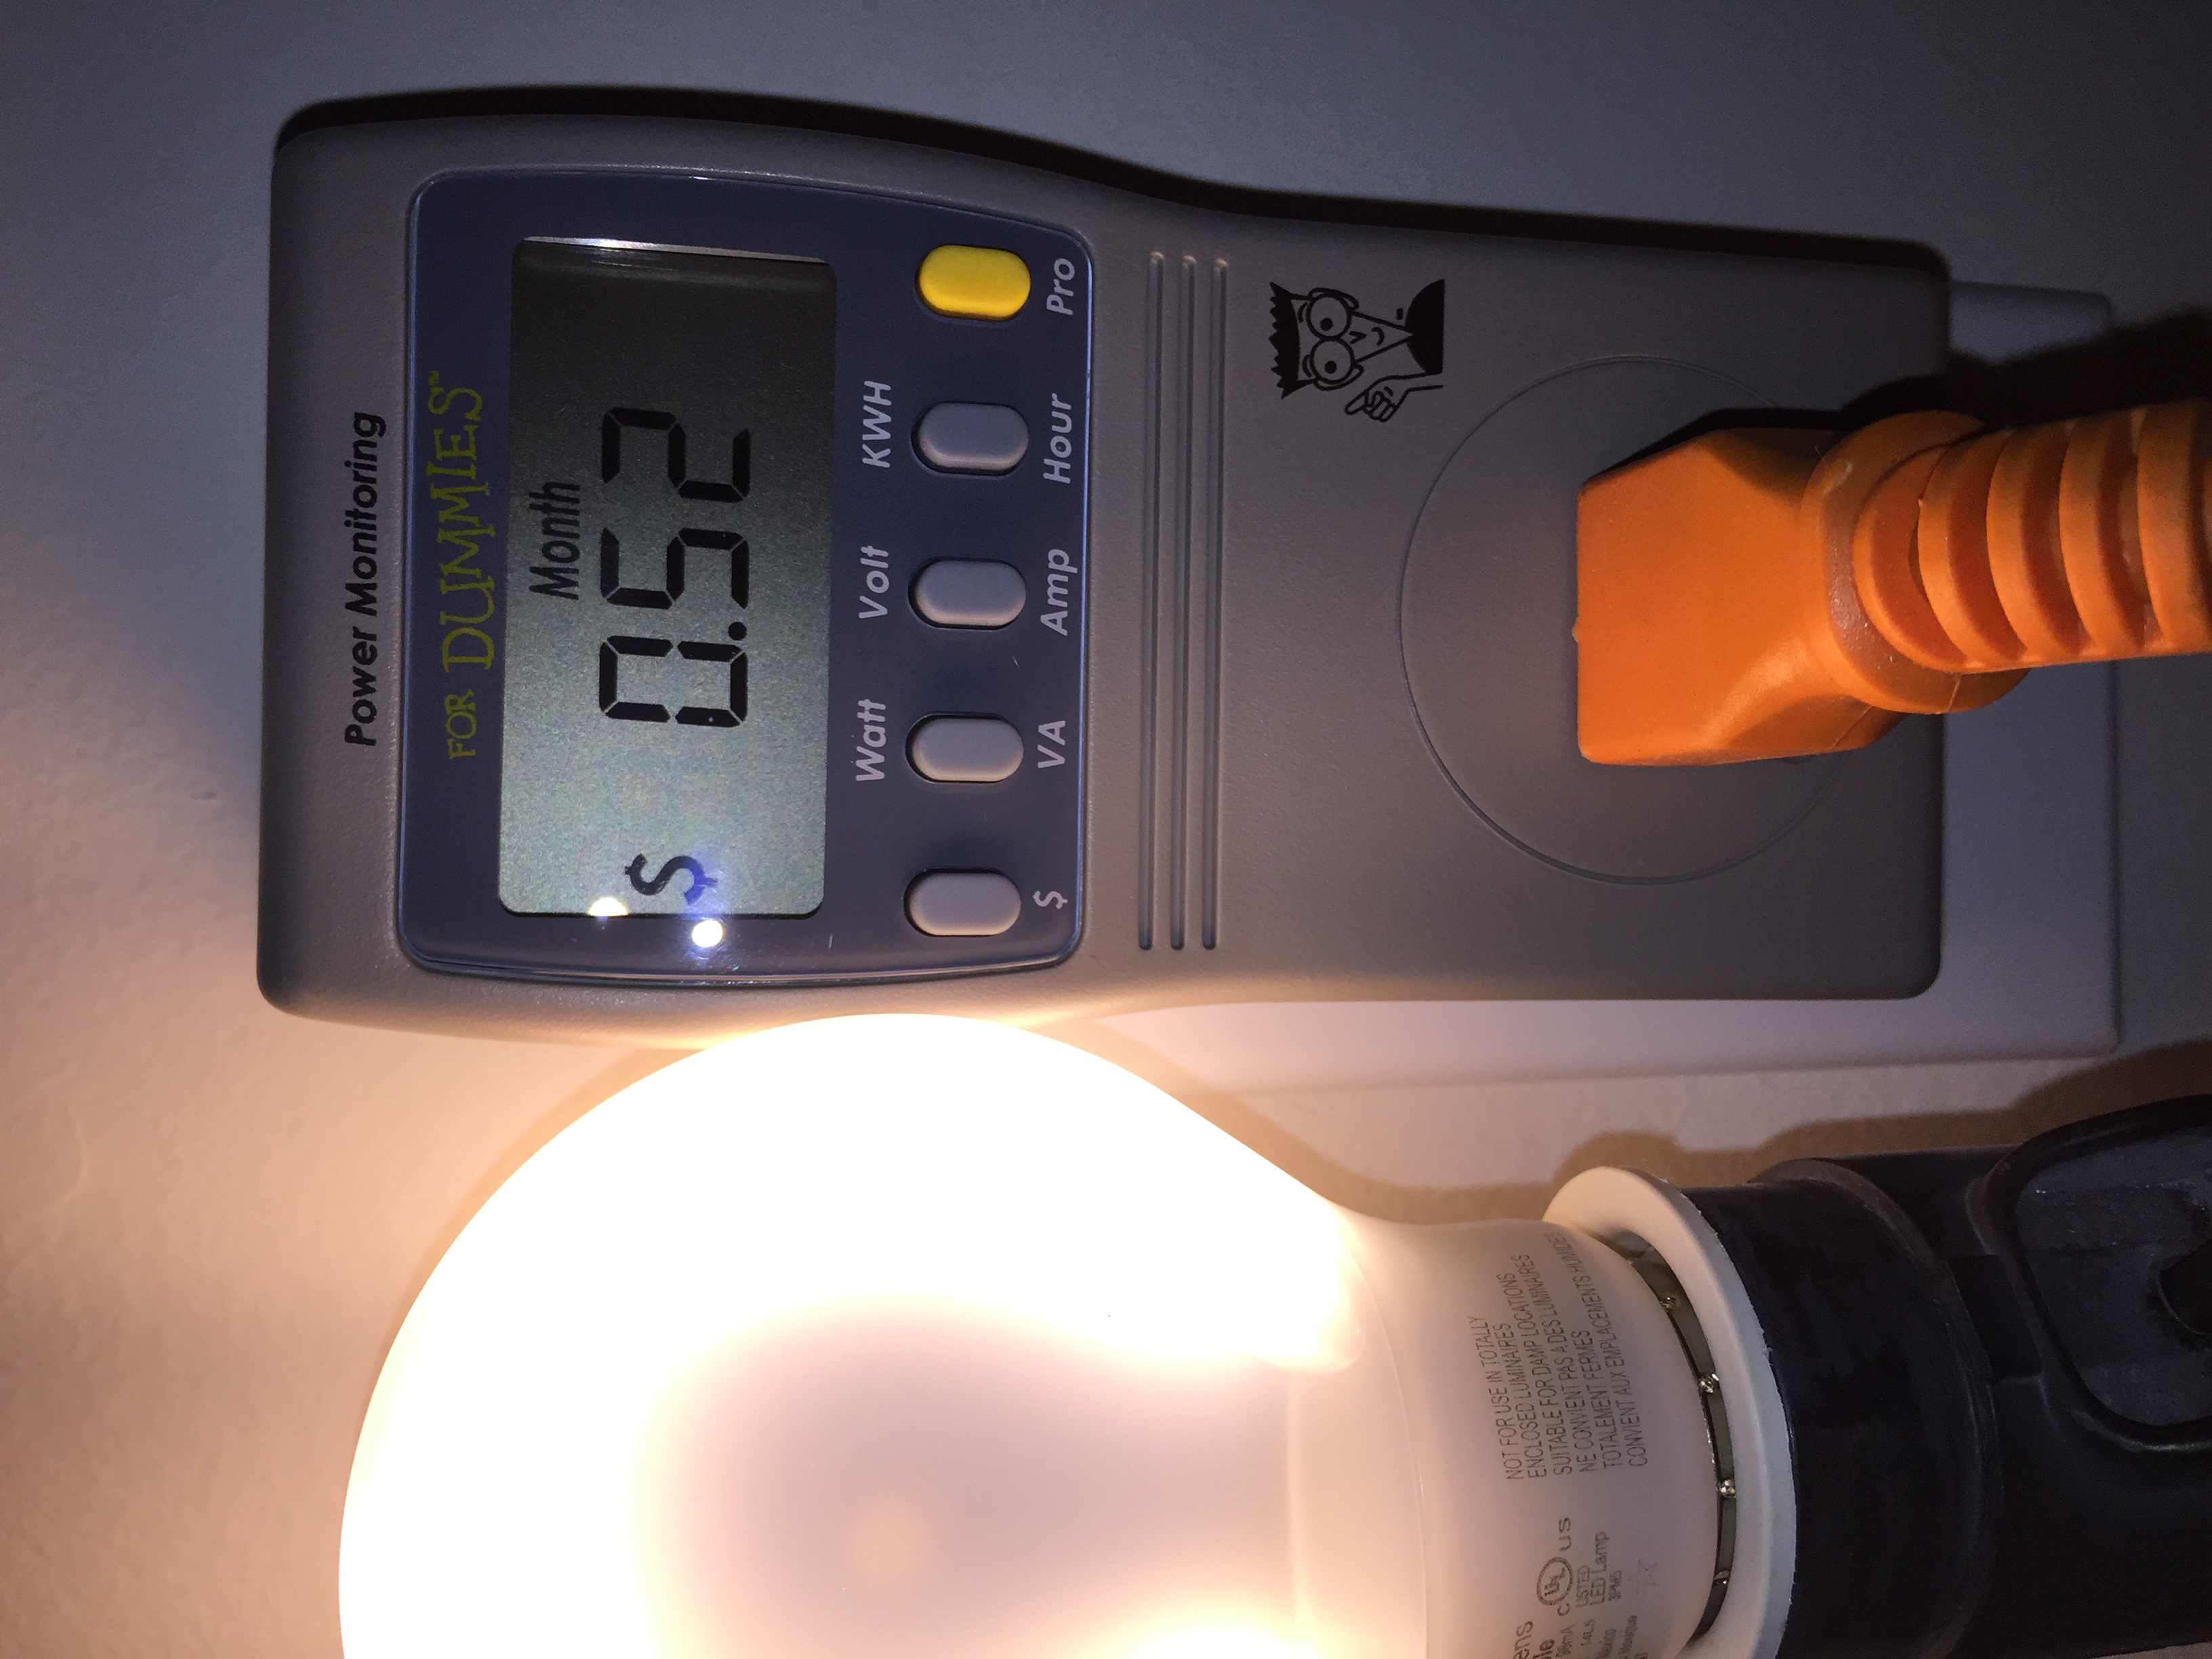
Incandescent VS CFL VS LED
Does it really make a difference? Test bed based off 6 different light bulbs, a normal sized 3 bed 2 bath house light count, 850 current energy and fuel costs and 1 year run time.... I present the data!
Data pulled from 850 bill
Current Electric Service - RS - Residential Service meter Reading
Billing Period
May 11, 2015 - June 10, 2015
Base Charge $ 18.60
Energy Charge 2391 kWh x 0.07352 175.79
Fuel Charge 2391 kWh x 0.04369 104.46
Subtotal of Electric Service $ 298.85
State Sales Tax - Lighting 0.00
Florida Gross Receipts Tax 7.67
Total Current Electric Service $ 306.52
#Energy Charge .07352 kWh
$2.73 / month Philips 60 Watt Incandescent / $1.63 @ Amazon
$1.83 / month Unknown Bulb Incandescent
$0.99 / month GE 26 Watt Energy Smart CFL / 100 Watt Replacement / $2.93 @ Amazon
$0.52 / month Philips 60 Watt Eq 10.5W LED / Bulb Life 22.8 years / $7.90 @ Amazon
$0.26 / month Utilitech 40w Equivalent 6.3W LED / Bulb Life 13.7 years / $2.48 @ Lowes
$0.26 / month Ecosmart 9 watt (40 watt Eq) CFL / Bulb Life 9 years / $2.34 @ Amazon
#Fuel Charge .04369 kWh
$1.76 / month Philips 60 Watt Incandescent / $1.63 @ Amazon
$1.02 / month Unknown Bulb Incandescent
$0.68 / month GE 26 Watt Energy Smart CFL / 100 Watt Replacement / $2.93 @ Amazon
$0.30 / month Philips 60 Watt Eq 10.5W LED / Bulb Life 22.8 years / $7.90 @ Amazon
$0.15 / month Utilitech 40w Equivalent 6.3W LED / Bulb Life 13.7 years / $2.48 @ Lowes
$0.18 / month Ecosmart 9 watt (40 watt Eq) CFL / Bulb Life 9 years / $2.34 @ Amazon
Energy + Fuel Charge x 12 months = Total runtime 24/7 per year
$53.88 / year Philips 60 Watt Incandescent
$20.04 / year GE 26 Watt Energy Smart CFL
$9.84 / year Philips 60 Watt Equivalent 10.5W LED
$4.92 / year Utilitech 40w Equivalent 6.3W LED
$5.28 / year Ecosmart 9 watt (40 watt equivalent) CFL
3 bed 2 bath Avg # light bulbs in house = 30
4 - bedroom 4 - bathroom 4 - bedroom 4 - bedroom 4 - bathroom 2 - hallway 2 - garage 2 - outdoor 4 - dining
30 bulbs cost per year + 30 bulbs purchase cost = Total Cost for 1 year use
(Philips 60 Watt Incandescent) $1616.40 + $48.90 = $1665.30
(GE 26 Watt Energy Smart CFL) $601.20 + $87.90 = $689.10
(Philips 60 Watt Equivalent 10.5W LED) $295.20 + $237 = $532.20
(Utilitech 40w Equivalent 6.3W LED) $147.60 + $74.40 = $222.00
(Ecosmart 9 watt (40 equivalent) CFL) $158.40 + $70.20 = $228.60
Conclusion:
Depending on your usage, purchase price has little to do with overall cost of bulb usage. There is clear savings based on the type of bulb you use and that clear winner in this test bed is the Utilitech 40w Equivalent 6.3w LED.
For our Residents:
Our properties currently have a mixture of CFL and incandescent and no LEDs so if you reside with us and are looking to save money on your utilities go ahead and swap your bulbs if you'd like and keep the ones already there placed in a box in a closet. When you move just put them back in and take your energy efficient ones with you!


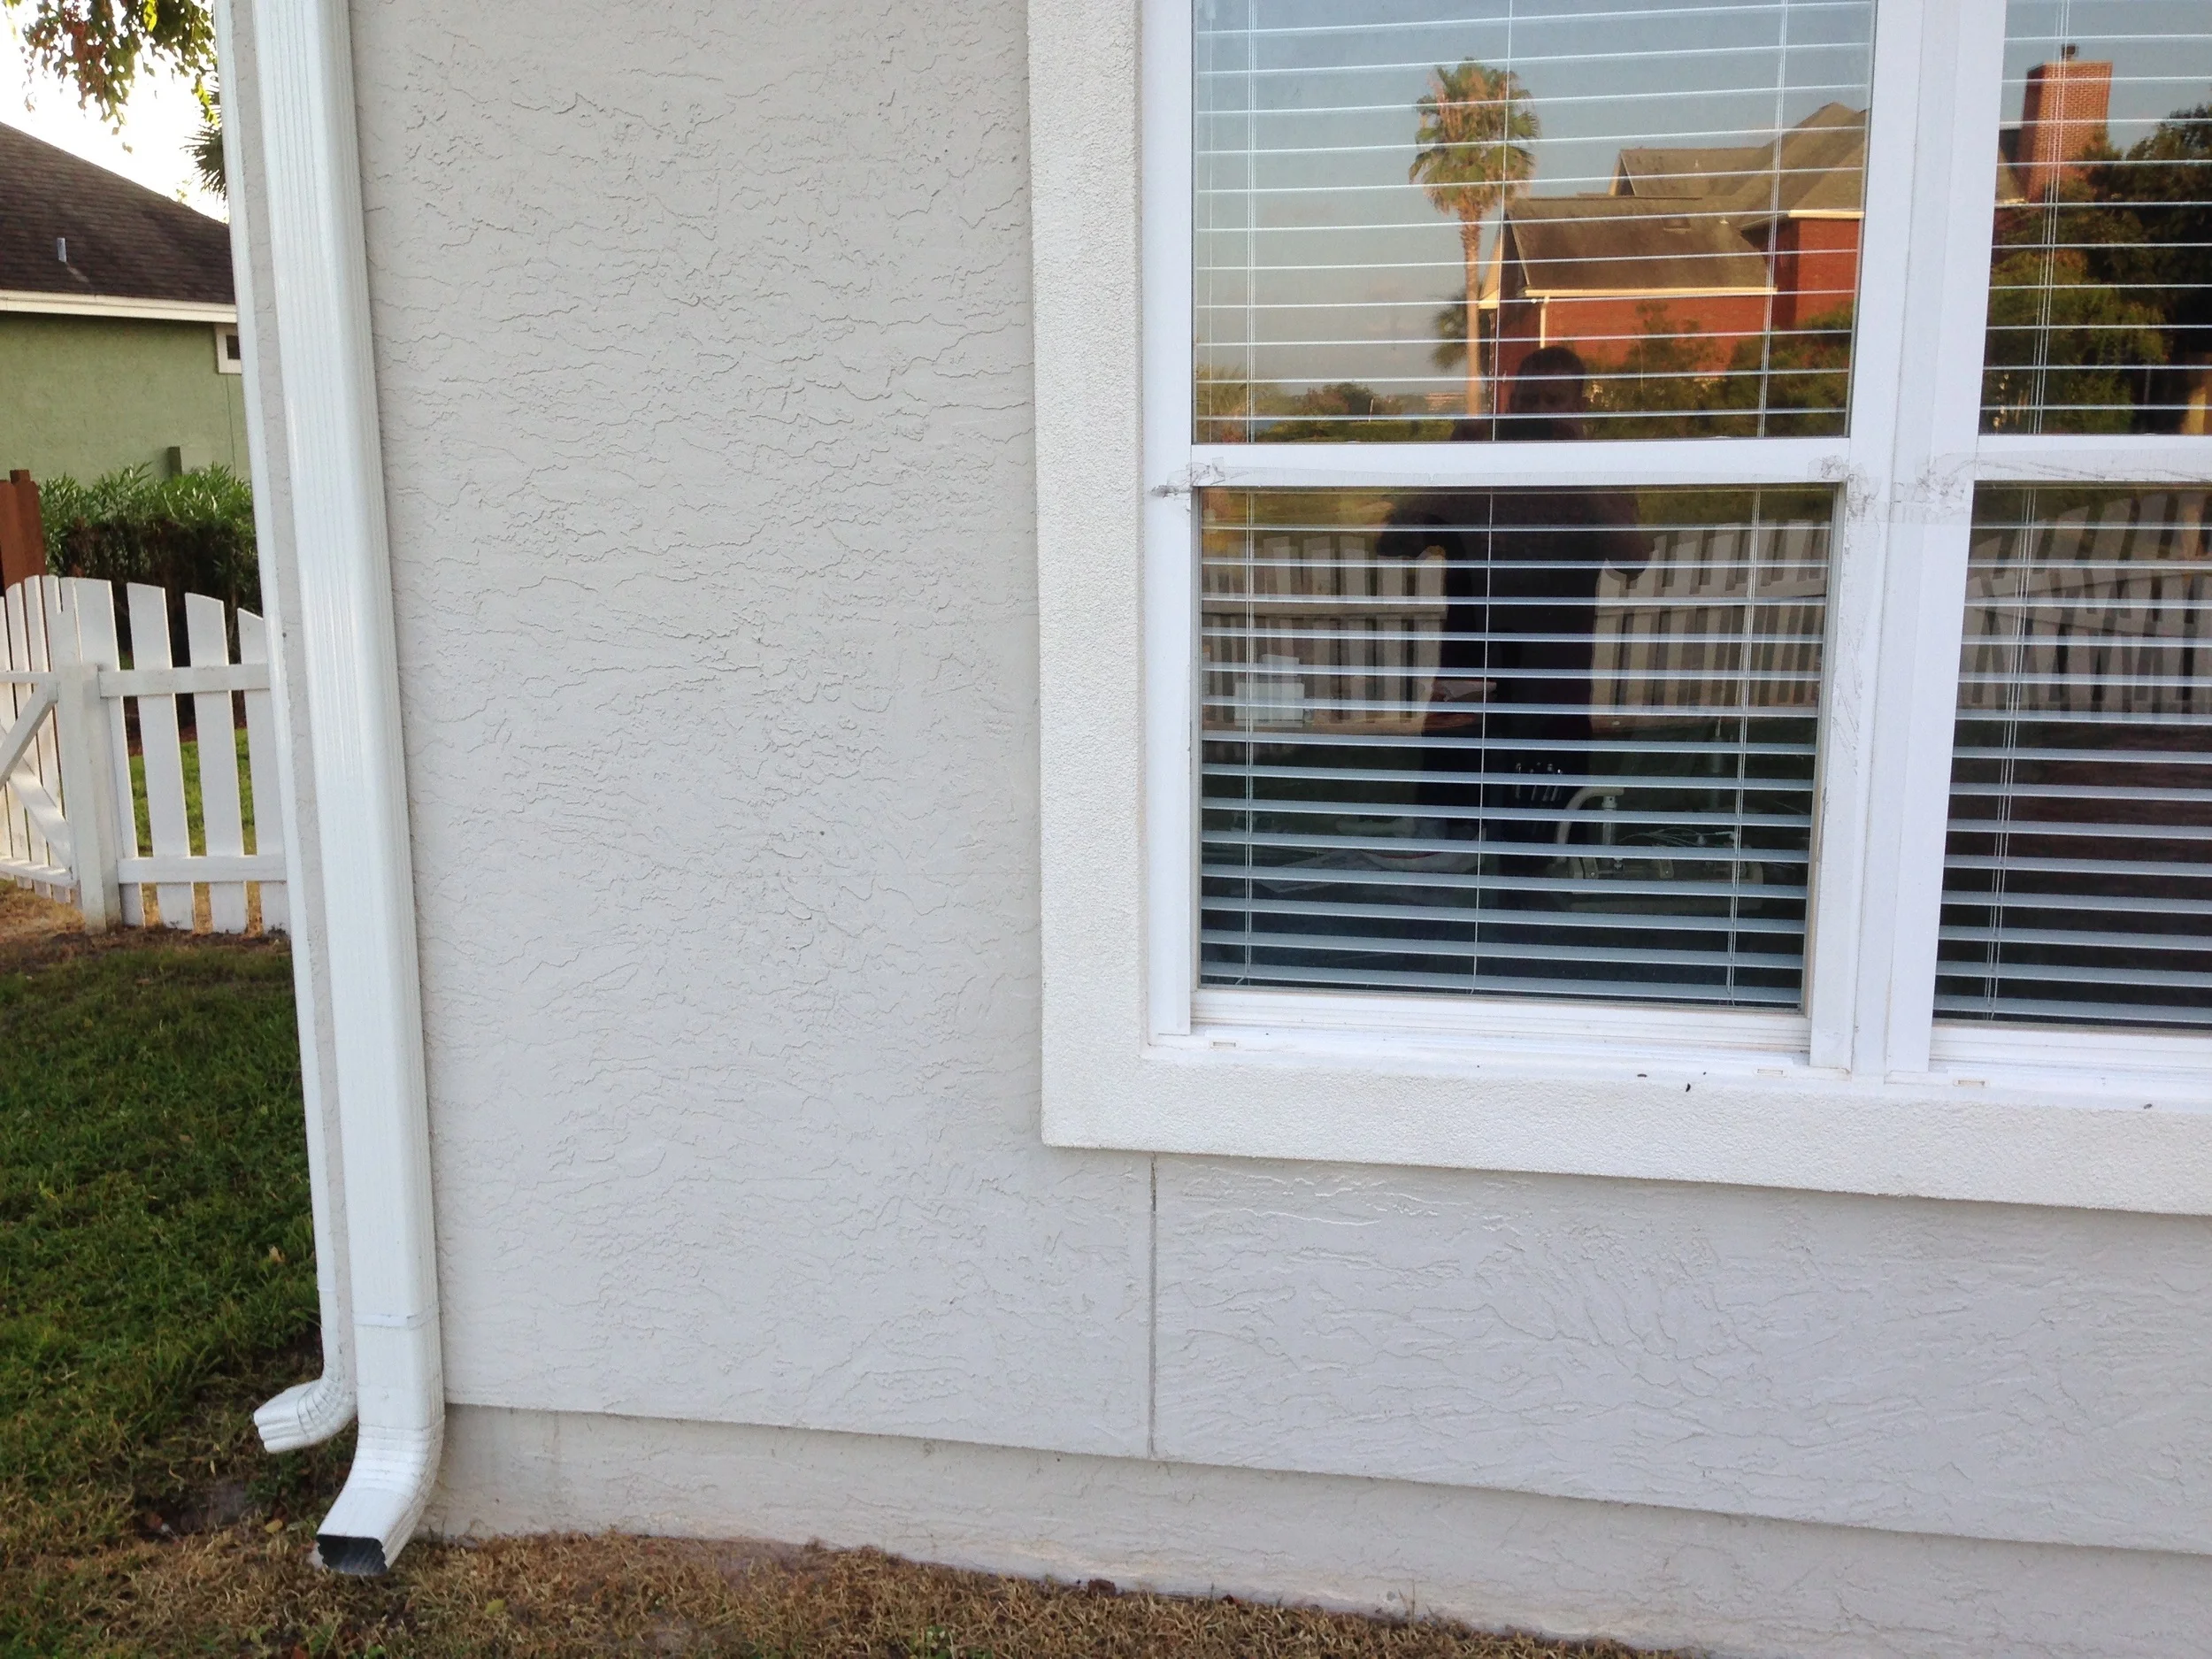
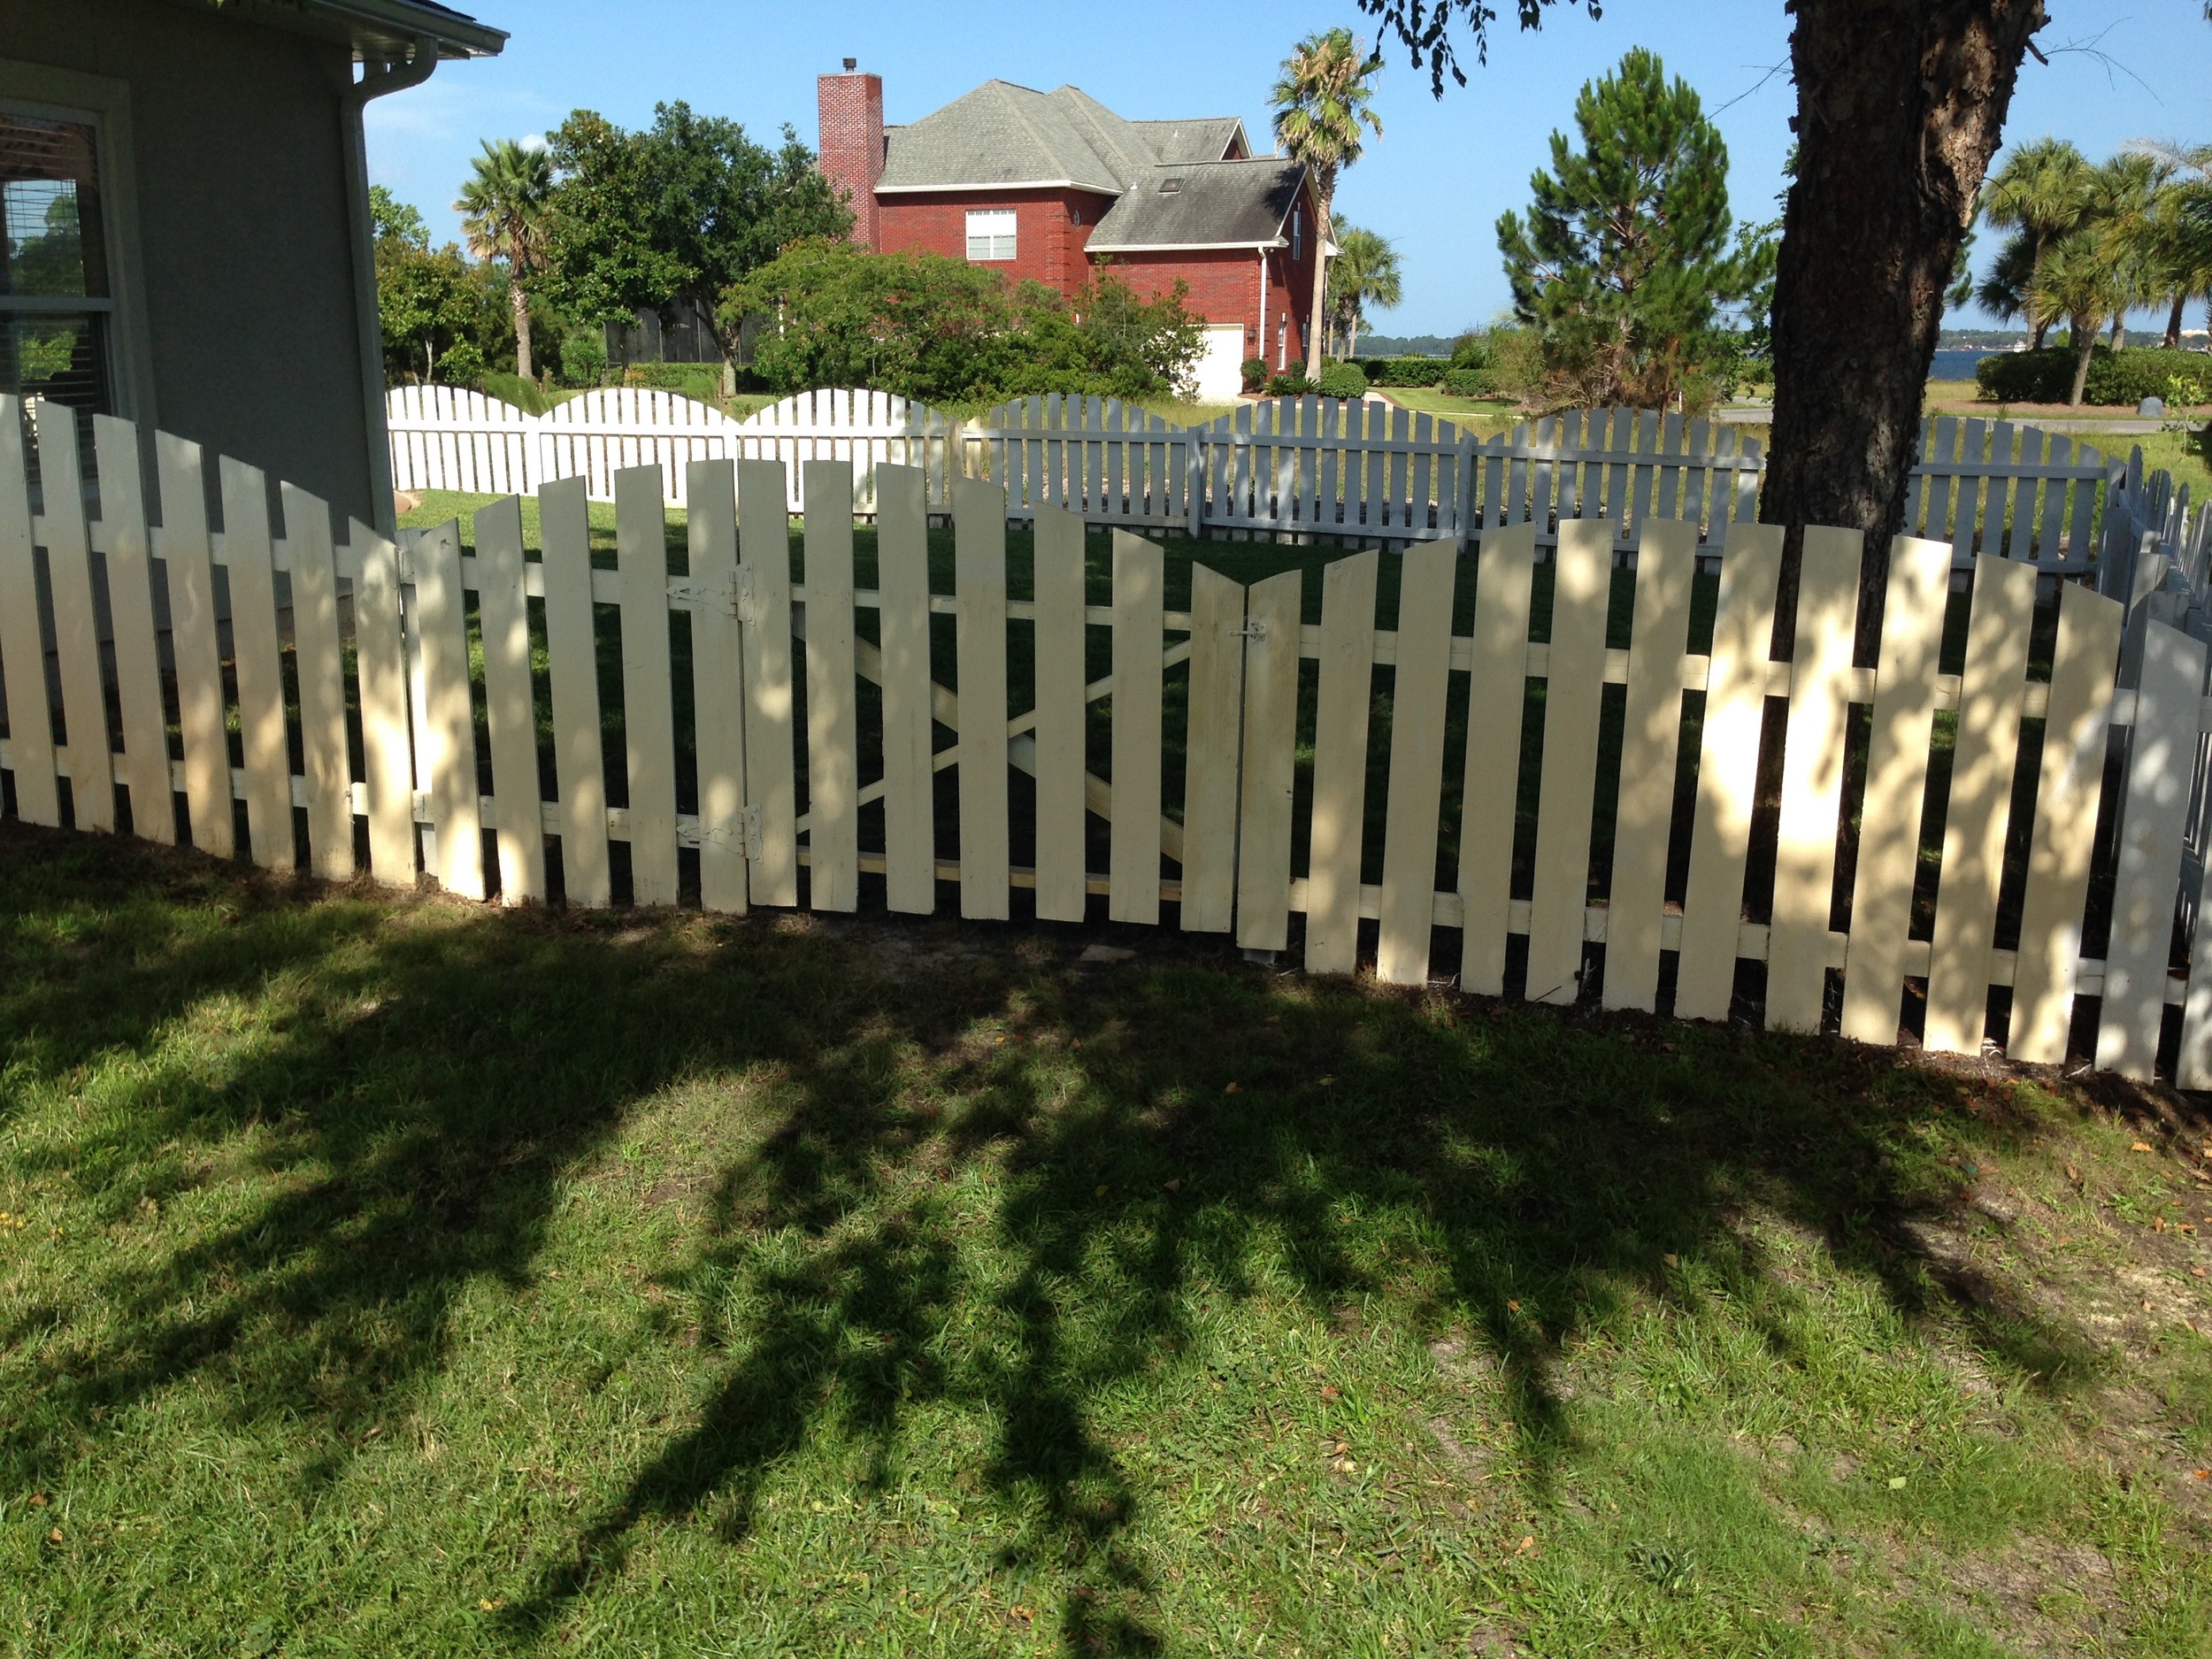
Rust Stains
Everyone's got em if you have a well. Tried 2 different solutions. A "professional" solution called F9 Barc concrete restore found online and goof off rust remover at the big orange store. The F9 Barc is around $45 a gallon and is diluted at a 2:1 ratio of 1 gallon F9 and 1/2 gallon water. So $45 for a 1 1/2 gallons of rust remover solution. Goof Off Rust remover is at $10 a gallon with no mixture. Comparing the 2 against a painted wood fence, concrete and stucco guess which one came out on top? The pro stuff right? Wrong. Goof Off wins this battle as a better solution which cleans all these surfaces better and quicker along with being over 50% cheaper. So, don't waste your money and get the cheaper and BETTER stuff! The F9 MSDS has a hidden solution which they only give to your physician should you get sick. Should have been my first guess. When spraying always wear a respirator and protective glasses otherwise have fun with acid in your eyes and lungs.... Chemical information below:
Goof Off MSDS
Hazardous Components (Chemical Name)
1. Oxalic acid {Ethanedioic acid} | CAS# 144-62-7 | Concentration <10.0 % | OSHA PEL 1 mg/mg3 | ACGIH TWA 1 mg/m3
2. Hydrogen fluoride {Hydrofluoric acid; Flouric acid} | CAS# 7664-39-3 | Concentration <0.5% | OSHA PEL 3 ppm | ACGIH TWA No data
F9 MSDS
Hazardous Ingredients (specific)
1. The precise composition of this product is proprietary information. A more complete disclouse will be provided to a physician in the event of a medical emergency
2. Ammonium Hydrogen Diflouride | CAS# 1341-49-7 | Concentration 1-5%
3. Phosphoric Acid | CAS# 7664-38-2 | Concentration 1-8%